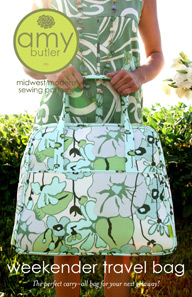
Since going on the Weekender bag-making frenzy last year, I did have plans to make some travel bags for me and my kids. I was sort of dreading making another one, honestly, although had the supplies to do so. Imagine my delight when I saw Don’t Call Me Betsy say she had planned to make an Aeroplane bag from Sew Sweetness, and the shape, although different from the Weekender, was cool and retro.

I read over the Aeroplane bag pattern instructions (available at PDF), and they seemed relatively straight forward. Handle construction is the same for both. For the Weekender, there are entire top/bottom assemblies attached to side panels. For the Aeroplane, two flat pieces are sewn together, and given shape with darts and gussets, which are more familiar (to me, easier) ways to construct a bag.
Here’s my (first) finished version of the Aeroplane. I had this twill fabric in my stash, intending it for a bag someday, and the khaki is a heavy twill leftover from the Weekender I made my mom.
The bottom of the bag has about the same stability as the Weekender as it does have Peltex sandwiched between a layer of Shape Flex interfacing and the outer fabric. The top of my bag is floppier than Sara’s because I only used fusible fleece instead of the sew-in thin foam (it’s what I had on hand). In the future, I would make it less floppy this by adding a layer of interfacing in addition to the fusible fleece.
My interior is a quilting weight cotton backed with Shape Flex, per the instructions. I skipped the interior zippered pockets since this version was meant to hold containers for other stuff already so they wouldn’t be needed. The instructions for it were clear, however.
For me the trickiest part was the zipper. I’ve been putting in zippers for 25 years, so zippers themselves aren’t the problem, but the particular zipper I had was a parka zipper, which is a bit bulkier than needed for this application. That made it hard for me to get my zipper ends tapered the right way since it had a double pull, but that can be easily fixed by not using a parka zipper next time.
I made the regular size for my daughter’s machine, and it fits perfectly! I do plan on two more versions of this bag: one will use home dec weight fabric to make an overnight bag for my daughter, and the other will be the long version (it looks like it’s 2″ longer) done in patchwork for me to use. Both of those will have the interior zippered pockets, and I’ll make them a bit stiffer by adding the extra interfacing to the back of the fusible fleece.
I think I might also add an exterior pocket between the handles on one side for my version, so I’ll talk about that process once I do it. Additionally, if you want to make the bottom even a little more sturdier (to hold a heavier sewing machine), you can add a false bottom with a piece of old cutting mat covered in the interior fabric.
So, if you’re looking for an overnight bag pattern and intimidated by the Weekender, I highly recommend the Aeroplane Bag. Heck, I’d recommend it anyway! Sara has a great blog post with lots of other examples on her blog.


Great looking bag, Pam! I’ve never worked with Sarah’s patterns, but like her blog a lot! Thanks for recommending the bag!
Sweet bag! I like that you showed stuff in it. Gives a good size reference.