WIP Wednesday: A Little Birdie Told Me

Oh hey, an actual quilt I’m working on!  We issued a challenge in the AMQG to make something creative out of a panel. I made this top for a sample, so I can’t actually enter it in the challenge since it was technically started/made before the challenge started, but it’s turned out pretty cute.  It’s supposed to be a Christmas quilt, although a different color palette than traditionally done: orange, turquoise, lime green, etc.  I used a LOT of squares from my 3 1/2″ and 5″ scraps to frame everything up.

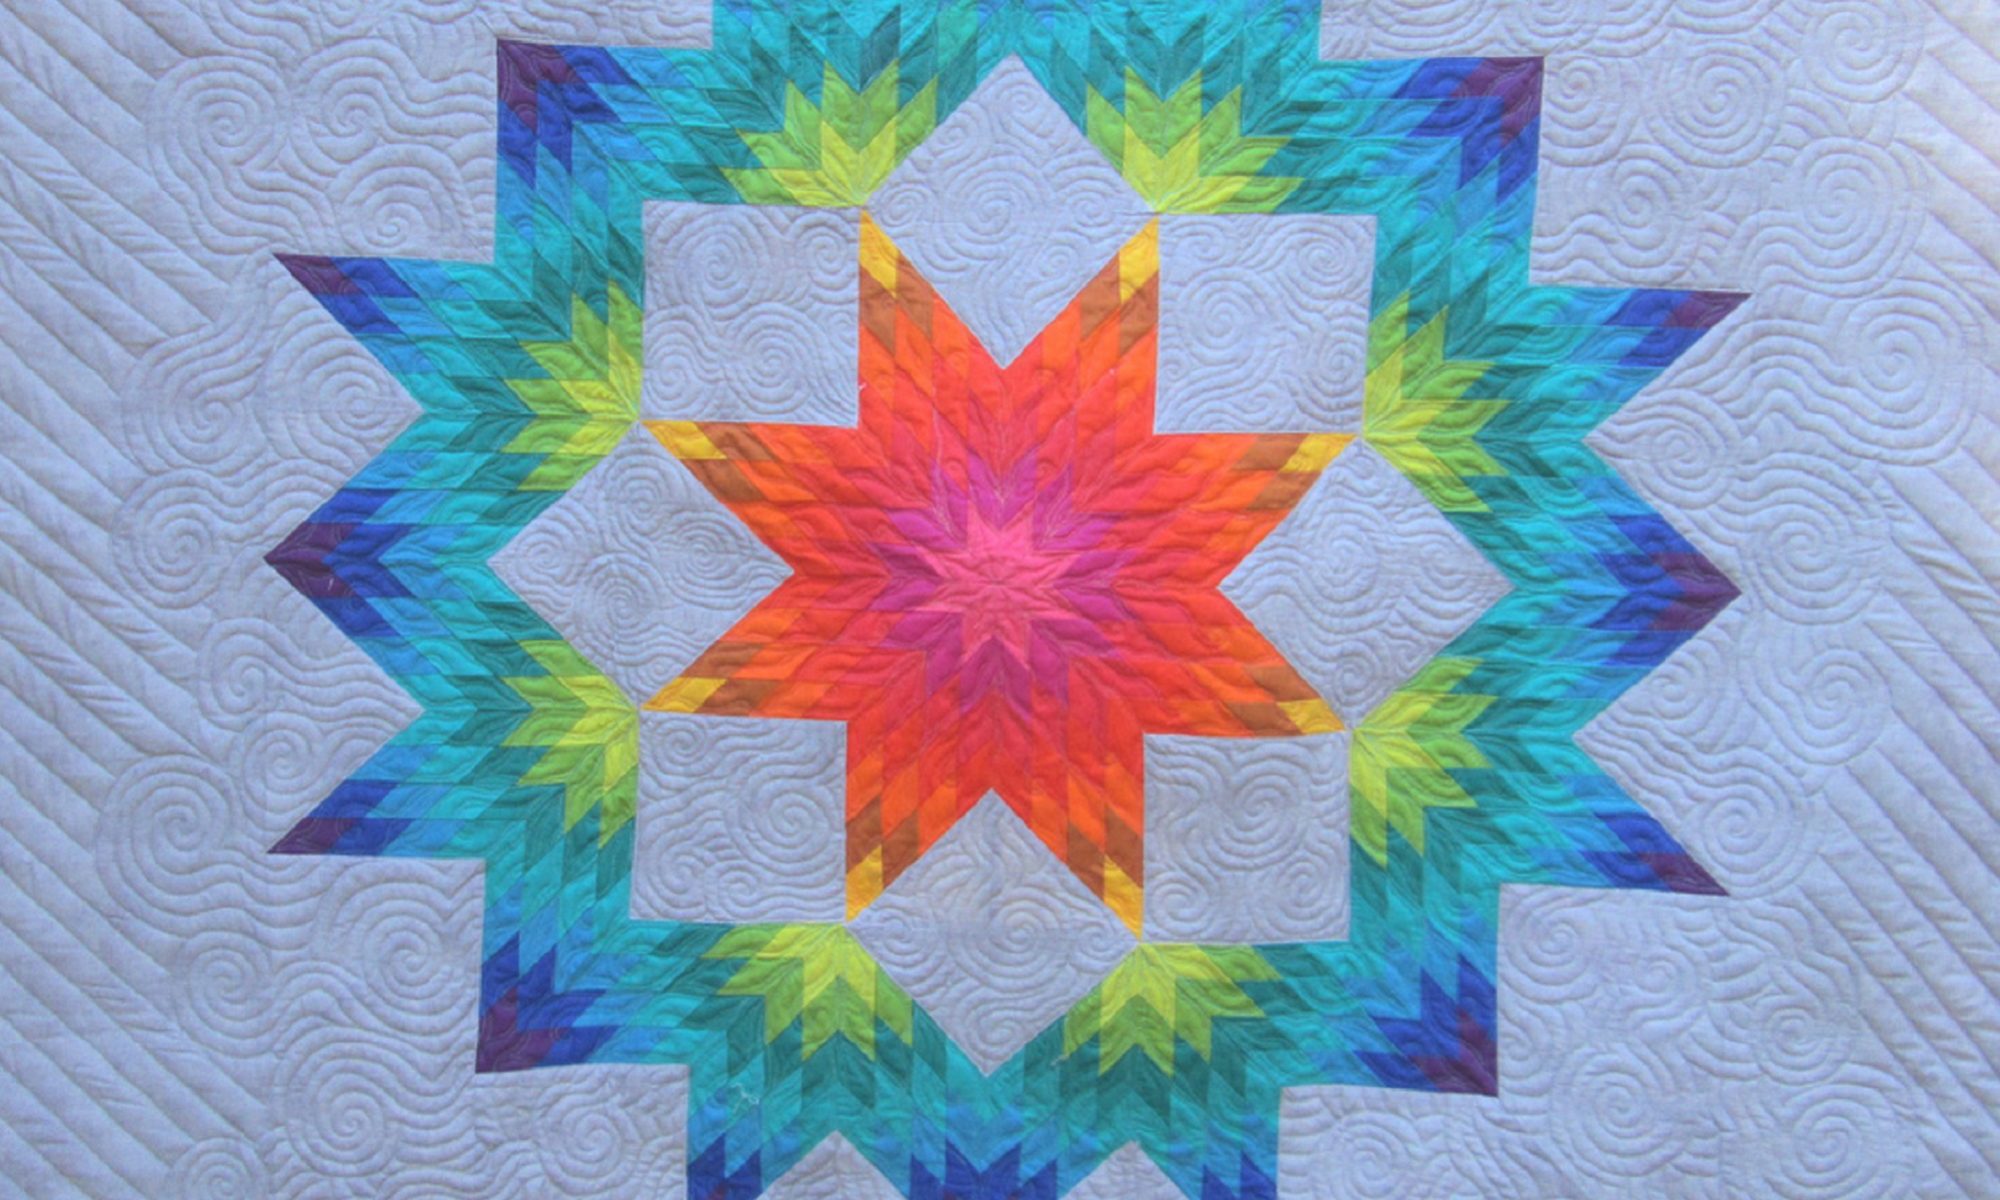
I’m quilting the charm square portions right now, and still have the borders, green, and white background portions to quilt.  I’m trying to branch out from my usual stipple, but my rut is very comfortable!  I’m trying to pick up the motifs from the panel prints, but my free form pear shapes are a bit too… squashy. And I need fruits, not vegetables!


Timeless Stitch Star: Plumed Pimpernel Revealed!

I’ve been hinting on twitter and the podcast that I finished this project last week, but I wanted to wait for the reveal until the contest deadline had passed and I was sure that Timeless Treasures had received my entry for the Timeless Stitch Star contest. When they emailed to tell me they had posted my video submission on their Facebook page, I knew the cat was out of the bag! So without further ado, here is Plumed Pimpernel:

The requirements for the contest were that you use at least two fabrics from one of the two fabric lines, and that all fabric had to be from the line. I chose the Plume line (obviously), and you can see a bit more about my design process in this video (and why I chose the name Plumed Pimpernel):

Here are some other pictures, or you can click through to the Flickr set to see them larger. Here’s what the gold vine applique piece looks like from the back with all the edges turned:
Here’s the failed New York Beauty border that I didn’t include:

Detail of the pebbling around the applique shape and feathers:

Such a relief to have this labor intensive piece finished!  I’ll talk a little more about it on the podcast tomorrow, but for now, it’s hanging in my dining room!

Modern Mini Challenge: Hello, Kitty.

I’ve decided to enter the Hello Kitty Wallhanging in the Modern Mini Challenge over at Ellison Lane Quilts (thanks to the encouragement of my guildmates!).  So, here’s a little more about it:

I made it based on a coloring page my daughter picked out, and did the center design and letters with fusible applique (remember the tutorial I did on that?)
The tricky bits were the bubbles, which I wanted to have a little sheen to them, so I used a double layer of tulle and some iron-on vinyl to get the look. They were tricky to sew down, but worth it.
Hello Kitty Wallhanging Close-up
I did my usual meander to fill in the grass and the sky, but did try a new design in the outer border using little loops around the letters.
The finished quilt is 25×30″, just the right size for over her bed!

Meet Westley

At long last! I can reveal my entry to the Robert Kaufman Kona Challenge that the Atlanta Modern Quilt Guild participated in.  Members of our guild were given Kona Bright solid charm packs from which to create a quilt. We could add any other fabric we wanted to it.  When I set out to make this quilt, I knew I wanted to do something different from all the rainbow looking quilts I had seen other guild members do, and I started thinking of the doodles that I do with my kids when we’re waiting somewhere and need to pass some time with paper and pencil. And… voila! I bring you the ocean:
Westley

At the top I embroidered a quote from The Princess Bride, which Westley says to Buttercup: “My God, if your love were a grain of sand, mine would be a universe of beaches”. This is pretty seminal to my marriage.

I hand-pieced the curved flag-shaped pieces to create the ocean, and then machine stitched the columns together. For the quilting, the wave shape of the water goes from really curly at the top to a gentle wave at the bottom.  I pebbled the sand at the bottom, and used a fish scale pattern on the grey border.

Here’s some of the details:

  • The brain coral I created using Texture Magic and some hotfix crystals.
  • The seaweed I created using Ultra Heat n Bond (the red package) to bond two charm squares together. I then cut out the various seaweed shapes and loosely stitched them down to the quilt top. With the UHnB, you can then go in with a curling iron or flat iron and reheat the pieces to shape them into curls or waves and they will stay permanently in that shape.
  • The octopus is slightly stuffed at the top and the legs are done using the same UHnB technique.

  • These sequin fish are my favorite bits - the sequins are stitched on by hand.
  • That little clam on the bottom has a pearl button on the inside.
  • The red anemone is hand-ruched, created from a couple shades of red in the charm pack.
  • The jelly fish are the first things I created.  I had the idea to sandwich some buttons under iron-on vinyl to get the translucent effect jellyfish have, and then used the UHnB method to create the dimensional tentacles.
  • The Selvedge Fish were the last thing I create after looking at all these trimmed edges I had - the pinked edges of the charm pack reminded me of fish scales.

Most of my guildmates had no clue which quilt was mine (we did a guessing game at the show to match up who made which quilt).  I was flattered that a lot people thought I made the Judge’s Choice quilt, but since I’m usually not a fan of “gluing sh*t on quilts”, I apparently threw a lot of people off the scent with my entry.