Denim Quilt and Other Finishes

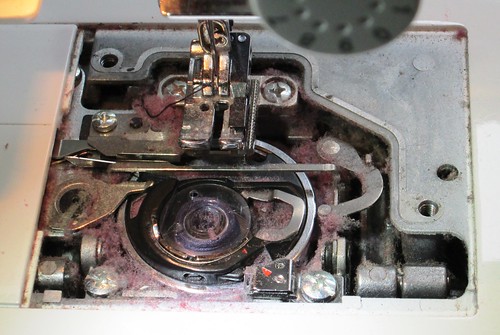
Having resolved the Camerapocalypse, here’s what caused the Lintpocalypse in my machine last week.

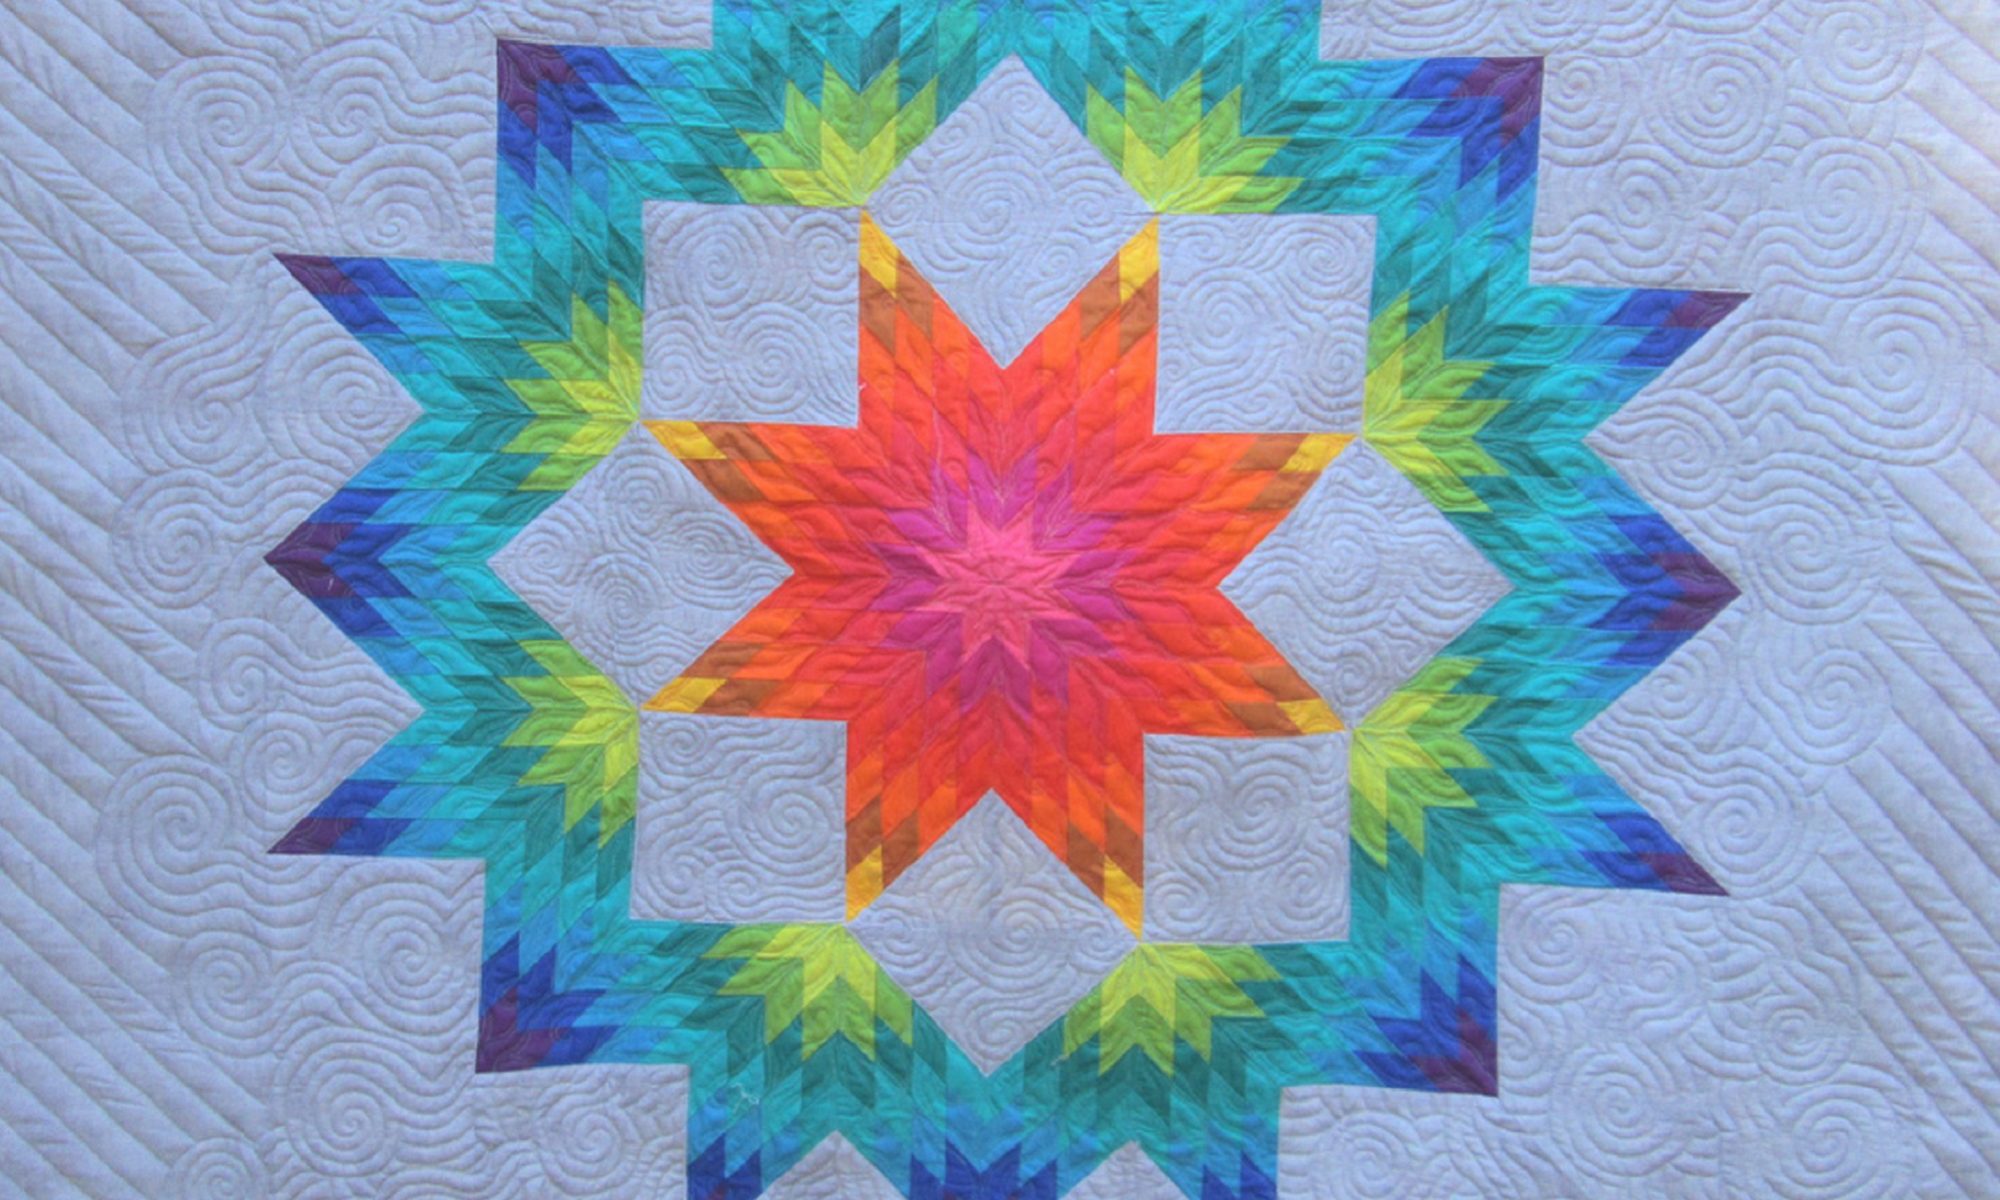
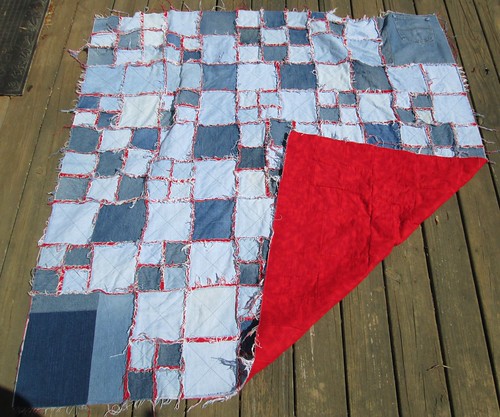
When Quilting Jenny had her blogaversary giveaways, I won the one on the last day, which was a kit for a denim quilt.  The finished quilt measures 60×60″.  To make it you, pair a denim square with a flannel square (wrong sides today) and stitch them together with an “x” on each block.  Then you piece the individual squares together into blocks that measure 12″ and then stitch them into chunks and then voila! you end up with a quilty-blanket sort of thing (with no batting since it’s rather heavy already).

Denim QuiltI used some red flannel for mine, mostly since that’s the flannel that I had on hand.  I had thought I would finish it last week to use for the finals of baseball, but wouldn’t you know that the weather over the weekend was warm enough not need it. So there’s that.

(everyone go buy a fat quarter! I used one of my catch phrases!)

Also, in her instructions, Jenny said you could speed the “fringing” of the seams by clipping the seam allowances. I found that wasn’t necessary since a good wash and dry cycle fringed it up nicely.

KitchenAid Mixer Cover

My mom was nice enough to send me pictures of the covers I made for her for Mother’s Day since I forgot to take pictures before I mailed them.

The fabric I used was the leftovers from her kitchen curtains, which I had previously used for her Pineapple quilt, Iz. I’m sure my mom has already figured out that, given the opportunity, cats will enjoy using those covers as forts.

Food Processor Cover

WIP Wednesday: Lintpocalypse

LintpocalypseBefore sharing what I sewed this week, I wanted to share what happened after I sewed last week.  This what my bobbin case looked like after sewing the denim quilt.  The denim itself wasn’t too bad, but the red flannel was pretty heinous, and the thread I was using (not Aurifil, which is my usual piecing thread, but a thicker cotton) took a big linty dump all over my machine.

Also, I got a new camera and I’m liking it very much. And I don’t even have to use Velcro and SuperGlue to keep the battery door closed!

Here’s the Lintpocalypse after.  I used my LED light to really spotlight the horror. My machine felt much better afterwards, and was back to its normal quiet self.

Anywho, this also has been a WIP for the house - the fence to enclose the new Bunnywind Downs!  We need to put in a gate on our wrap-around porch so Fred can’t escape that way, and then he’ll be free to explore the backyard to his heart’s content. The human kids are also excited they have a new place to “explore” this summer since we didn’t really encourage exploration of the woods behind our house before, and now there’s lots of secret tree stands and forts to build.

And now actual sewing, which is sort of a secret since it’s a quilt for a friend.

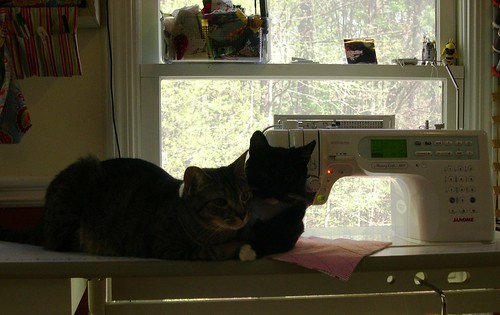
I’m sure you all can imagine that of the 30 pictures I’ve taken with the new camera, about 25 of them have cats in them.

WIP Wednesday at Freshly Pieced

Small Finishes with an Accidental Rant

I said on twitter that there’s nothing like a big applique project looming to inspired one to tackle a lot of little projects.  So here’s some small projects I finished lately.

I’ve been meaning to make a mixer cover for a while now, so I took out my gingham/cherry fabric and tackled it using this tutorial. Rather than add piping and have raw seams on the inside, however, I sewed the quilted panel with interior sides together, and then did a traditional quilt binding on the exposed seams, which mimics binding.

I also had a pattern for a zipper pouch with a vinyl window I’d been meaning to make, so I made it with the same fabrics I used for the purse insert. I’m not linking to the pattern designer because it was HORRIBLY written.  I got three steps in and just made it up myself because the directions made ZERO sense. I ended up sewing the two sides together and then overlocking the seam so you can see it through the window, but that was about the best I could do.

You’ll note I staged the photo with a rotary cutter and seam ripper because that’s apparently all people carry in see-through pouches?  I was Googling tutorials to get ideas on how to finish it once it was clear the pattern was crap, and that’s all anyone had in their pictures - rotary cutters and seam rippers. I’m sorry, but I don’t view a rotary cutter as one of those super-portable tools I’d haul around for hand piecing. Sheesh. Maybe I should have staged mine with mini bar bottles and spare tampons?

Sorry, writing about sewing that pouch got me all riled up again.  Here are pictures of cats to sooth us all again.

Boyz being Boyz

Lucky / Bloom Bunting

I finished this a while ago, but forgot to post pictures of it. Since St. Patty’s Day is coming up, we’ve got the Lucky side hung up:

And here is the flip side for Easter, which says “bloom” (and needs better contrast in the letters):

Waves Pillow: A Buffalo Quilting Finish!

Meet the Waves Pillow:

“Waves” (or “Mr. Pillow” if you’re nasty - Janet Jackson holla!) should look familiar if you remember the Blue Swoon quilt.  Waves is made of the bits trimmed off the flying geese units from the blocks.
Waves likes lounging on the back deck, snuggles, and sunbathing. He’s got a little surprise on the back side (always a good statement in a personal ad, no?):
Lime green Kona! Buttons!
Waves will be listed in my etsy shop once I get his friend finished.  I had enough HSTs from the Blue Swoon quilt to make two pillows with some HSTs leftover, too.

Extreme Room Makeover: Racetrack Edition

Rather than beat around the bush, I’ll start off with the coolest part of my son’s “new” room:

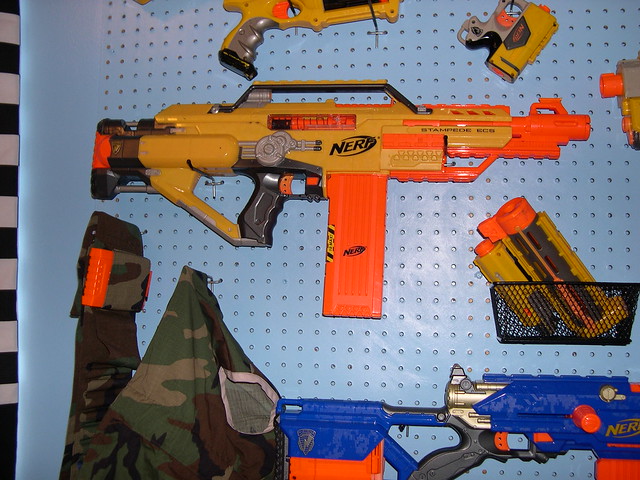
The Nerf gun rack! It’s the first thing you see when you walk into his room. It’s made from pegboard painted to match the wall, with 4″ pegs dipped into Plasti-Dip to give a little more grippy-ness.  For those interested in the construction, this is what the back looks like:
It’s backed with a frame of 1×2’s, screwed in from the front. Very simple to do, and then mounted to the wall into the studs with screws.  Here’s a close-up of one section of the finished piece:
Nerf gun rack close-up
The bandolier made from my dad’s old fatigues is hanging on the far left.  I also got some baskets to fit into the pegboard to hold the smaller items.  Anywho, if you look at the first picture, you’ll see the closet door just to the right. But it’s no ordinary closet!

It should be no surprise that we have secret labs at my house. I made that using a tension rod and a yard and a half of fabric, and fused the letters onto the fabric.

And now, we’ll circle the room counter-clockwise. Curtains! My son said his favorite number was 96. I have no idea why.  The fabric on the valance is racing helmets and checkered flags.

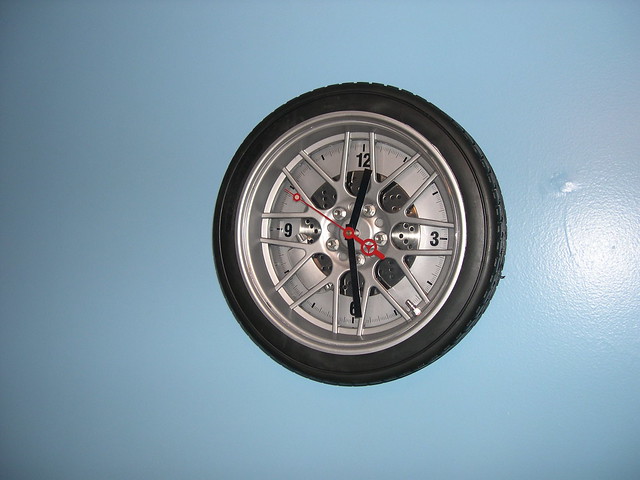
And here’s the rest of the elements: tire wall clock, posters, etc.

Making an Applique Wallhanging from Coloring Pages

With my daughter’s room redecoration, she wanted a Hello Kitty picture over her bed. I’m okay with posters, but wanted to make something a little fancier, so I started poking around for Hello Kitty pictures I could adapt to a quilted wallhanging. The good news is that Hello Kitty has very simple lines, and there are a plethora of coloring pictures available.

The first thing I did was find a picture I wanted to use. I just Googled “Hello Kitty coloring pages” and scrolled the Google image search until I found one I liked.

A word about copyright: Sanrio owns the Hello Kitty image. Since I am making this for personal use, and will not be selling or seeking to profit from it, I felt it was okay to use this image. If you want to do something similar for yourself to sell, you have to use public domain images.
I do my “graphics” work in Microsoft Powerpoint. It’s not a graphics program, but it does give you the ability to print a single page as a poster; i.e. - it blows the image up from a single page to fit 2 x 2 pages.  And since I’ve used Powerpoint since Moses was an undergrad (as they say at Georgia Tech), it’s relatively easy for me. There are better graphics programs that also have this same enlarge feature, so adjust your work accordingly.
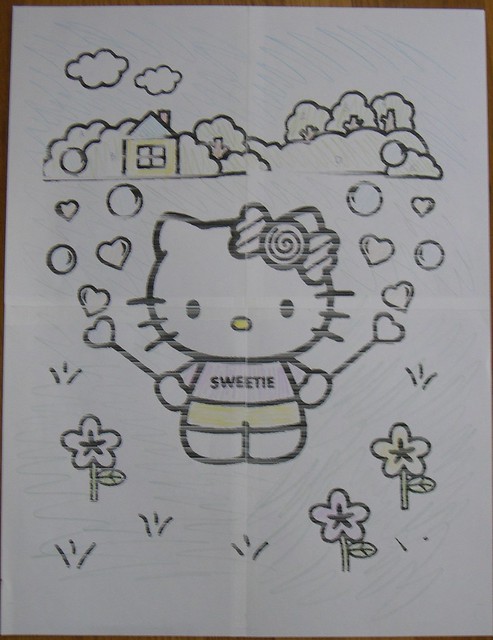
Once I blew up the image and printed it out, I had to tape it together and figure out what colors I want.
Original Drawing
Here is when you can have your assistant of choice help color (such as the child you might be making this for). I chose to do it myself, lightly coloring in with colored pencils so I’d know which fabrics I needed to pull from my stash. Once that’s colored in, I traced all the individual shapes onto a paper backed fusible. Now, tracing the image like this means that when I fuse the pieces on, they will be in a mirror image. Since my image is fairly symmetric, this doesn’t bother me. It’s most important to reverse images when tracing letters.
Here are my chosen fabrics with the cut out, traced pieces of paper backed fusible:
After fusing all the applique pieces to the fabrics, I trimmed them carefully on the outline and sorted them by location, i.e. - all the flower parts went together, all the kitty pieces, and all the bushes/house pieces go together.
I chose to fuse together those groups of pieces into large applique shapes using an applique pressing sheet. You can fuse them onto the background individually, but I feel like doing the groups gives me a little more control.  Here’s I’ve laid out all the kitty pieces onto the sheet after peeling off the paper backs:
The benefit of using a coloring page is that the black lines are really thick and easy to see through the pressing sheet. If you’re lines aren’t that thick, you can use a lightbox, or what I call a “redneck lightbox” (holding it up to the window). Press these pieces to fuse them together, and then peel the whole thing off the pressing sheet.
Once I got all the pieces fused into groups, I then fused them onto the background piece (I pieced together a piece of green for the grass background with a piece of mottled sky blue to make the total background piece). I knew I wanted to use the zig-zag stitch to secure the pieces, and I decided to let that double as part of the quilting so I didn’t stitch any of the pieces down at this point.  The one exception is the bubbles, which I created using a double layer of tulle and an overlay of fusible vinyl. Those I stitched down before sandwiching the quilt.
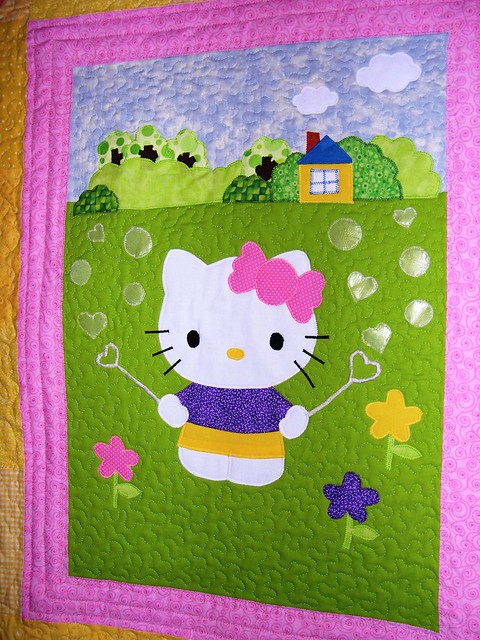
I added a small inner border, and then an outer border of simple squares.  Sandwiched with cotton batting, basted, and voila! I was ready to quilt.  I zig-zagged the outlines of all the applique pieces, and then FMQed the rest.  Here’s a close-up of the center (I used the flash to show the sheen of the bubbles, but that made the rest of it super bright):
Hello Kitty Wallhanging Close-up
And here’s what the whole thing looks like from afar, hanging over my daughter’s bed:
Extreme Room Makeover: Square Edition

If you follow my tweets (and even if you don’t, it’s a good place to see what’s going on with the podcast and you don’t have to sign up for anything just to see them), you’ll know that I spent last weekend redecorating my daughter’s room. Normally I would be sewing up a storm, but it was time for a room update since the periwinkle paint color is one I picked for a guest room before she was born.  She loves all things “cats” (wonder where she gets that from?), so she requested a Hello Kitty room, and that it be painted yellow.

Here’s a before shot (I think she’s 3 years old here, on the throes of a Dora the Explorer phase given the wall stickers and Dora dress):

The bed quilt I made for her once she got that bed, which is a full-sized antique bed we got from my husband’s aunt.  The quilt on the wall is her “baby” quilt, which I finished when she was two.

Here’s what that same shot looks like now, after the re-do:

That bed quilt I bought for $8 at a yard sale. It’s awesome and snuggly.  That’s not a body hiding under the quilt - it’s the (VERY LARGE) collection of stuffed animals she sleeps with now. The wallhanging is one I just finished earlier today, and I’ll be posting a tutorial on how to make an applique wallhanging from a coloring page (and better pictures of it).  Also, for those interested, the bed normally has boring finials on top of the posts, but I found these dragonflies as part of a landscape lighting set and thought they’d be perfect for a little girl’s room.
Here baby quilt is now hanging to the left of the bed:
Here baby quilt has little applique elements from her baby clothes.  I still have plans to do some sort of fun garland to dress up the Ikea LACK shelf over it. 
And here’s the curtains I made for her room (right side of the bed). I couldn’t find Hello Kitty fabric to make the curtains, so I went with just pink cat fabric for the top, and a bright pink with white Swiss dots for the bottom.  The Hello Kitty “dangles” I found in the party section, and they hang from her memo board.
If you turn a little more to the right, here’s the chair I recovered for her (same fabric as the memo board). I also made the Hello Kitty pillow by blowing up a coloring page I found online and using it as a pattern.
And finally, here’s the dresser, showing the baby quilt in reflection. The clock was the thing that started the Hello Kitty mania; it was a birthday present from my in-laws.
You can see that the yellow of the walls appears in varying brightnesses - that’s a hazard of taking pictures on two different days! We’ve got a couple other elements coming in - the garland, a poster, and I have plans for a little embroidery project to hang in there as well - but she’s still happy with it.

Daisy Cheese Chair

This week, I finally finished the reupholstery project I start a couple months ago. When Boxer moved into his Big Boy Bed, he got a re-furbed chair that we’ve since named the Denim Marshmallow, but since Bloomer’s Big Girl Bed is a full-size, it’s big enough to pile in and read books in. Thus, her new chair didn’t need to be as big. I picked up this on at the yard sale for Good Mews last year for $10. Of course I forgot to take the Before picture of it, so this is the best I could do:

Note: it didn’t come with the writing on it. That’s what you do in the re-upholstery process. But the fabric was… odd. Cute, I’m sure, but certainly not within the decor of her room. And it was shredded in some places, which is merely the hazard of getting furniture from a yard sale with items donated by people with cats.

And here is Bloomer, enjoying her new chair (with Blanco Bear). This is one of MANY shots she had me take because she likes saying “CHEESE!”. I also have several of just Blanco in the chair.

The skirt’s a bit poofier than I would like, but I think it will settle down once I steam it some. I like this size chair because it could work at a desk or a vanity for her, or it can just be a reading chair if that’s what she wants. I originally had planned to recover a love seat with this fabric, but I just didn’t want to tackle that project after thinking it over (and I hate working on the fussy shell-pattern back it had - ugh). That means, though, that I have quite a bit of fabric left over. Not a bad thing, since I inherited an old wood chest from my mom that currently has some plaid fabric on it that I can replace with this daisy print for her room (and add some safety hinges).

Now if we could only get her to sleep in her new room… (but I’m not complaining too much, such in the crib she’s contained at night!)