Tag Archives: teaching

Psst… Wanna buy some charms? Tutorial

Psst... wanna hold some charms?A mildly naughty charm holder tutorial!

One of the guilds I belong to awards two types of charms for larger finished projects.  The first is the coveted Golden Thimble, which is for projects that are entirely stitched and quilted by hand that measure at least 280″ in perimeter. I don’t have one of those, but am hopeful my EPP project will get there (someday).  The second, which I’ve earned several times, is the Golden Scissors, which is for projects of the same size, but made with a sewing machine.  After collecting a couple of these tiny golden scissor charms, I started thinking I needed a fun way to hold them. And I started thinking about the random “scissor guy” that shows up at any sewing expo, who in fact has a legitimate booth, but I imagine him in dark alleys with a trenchcoat trying to push illicit scissors. So I made this guy in that vein.

Continue reading Psst… Wanna buy some charms? Tutorial

A Kid’s Guide to Sewing: Learn to Sew with Sophie & Her Friends

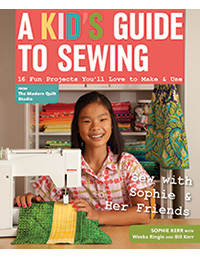
Bloomer & I got an amazing opportunity to review the book “A Kid’s Guide to Sewing: Learn to Sew with Sophie & Her Friends” from C&T Publishing.  What I didn’t realize when first looking at the book was that Sophie Kerr (who I recognized from some spots on Quilting Arts with Pokey Bolton) was the daughter of Bill Kerr & Weeks Ringle, some of the pioneers of the modern quilting movement.

I’ve been mulling for a while how best to teach Bloomer to sew. On the one hand, I don’t want to force her into projects because she’ll come to hate it (and the time I spend helping her with projects takes away time from me doing my projects!), and on the other hand, I think it’s a great tradition to continue on. Let’s make it four generations of sewists in my family!  And possibly more, since I’m sure Grama Eddie’s mother and grandmother had to sew out of necessity.

What I think is great about this book is that it really lays out the basics of sewing terminology, getting to know your sewing machine, and elements of various stitches including embroidery stitches.  I skipped that part of the book because I’ve got over 25 years of sewing under my belt, but I suspect if I left the book laying around Bloomer would pick it up and read it (even though she’s only seven).  I do think that part of the book is an excellent reason to get it for a child/tween without a sewing heritage, like if you were an “auntie” for a friend’s kid if your friend didn’t sew.

I had Bloomer peruse the book and pick out a couple projects, so we started with a headband for her to wear at gymnastics. She claims that the ponytail pulls her hair too much, but her hair has to stay out of her face.  The directions were clear (and elucidated a part of headband sewing I had never mastered as a teen, so that was helpful), and illustrated well.

We worked on this together, with me doing the rotary cutting and ironing (although she measured some things), and us splitting the sewing machine sewing.

She also picked out a felt ornament to make in the shape of an ice cream cone.  She picked the felt colors and I had her trace the pattern, then I cut it out, and then she traced the pattern on the felt pieces.  She did ALL the hand embellishment with my old bead collection from when I was in high school, which I realized were leftover from craft time with Grama Eddie.

This was her first time doing any hand sewing, and she poked herself a couple times but no bleeding.  I did help do the blanket stitch around the edge, and then she hung it up on about 50 different doorknobs before settling on one.

So in general, I definitely recommend this book for a new sew-er, especially if their parents don’t sew.  The projects are listed in order of increasing difficulty, and there’s enough variety that you don’t think you only making totebags.

C&T is generously letting me give away a copy of the book! You can use the Rafflecopter thingy below to enter, and the giveaway will stay open for a week.  If a US winner is chosen, they’ll receive a hard copy of the book, and an international winner will receive an e-copy.

a Rafflecopter giveaway

Blooming

When I put a sewing machine on my daughter Bloomer’s wish list for Christmas, it was more of a “gee wouldn’t that be fun… someday” sort of thing. She likes to make things and draw things and generally very crafty, but hadn’t shown a lot of consistent interest in sewing herself. So imagine my delight when I asked if she wanted to make a card for my mom’s birthday (which is tomorrow, the 25th), and she said she wanted to make her a quilt instead.

The benefit of having my scraps already cut out and organized means that she can go in the box and pick out squares that are ready to go. She picked out four squares for a simple four patch, and off we went!  Once we got the 4 patch top put together, she picked out a 10″ square for the back and sandwiched it. To keep it easy, we just straight line quilted it with a couple lines on each square.  I did the binding on my machine since it’s kind of a tough thing to master.

She’s a big fan of using the foot pedal and the reverse switch on her machine. She’s not quite to the point of guiding the fabric herself under the presser foot, and is relying on my to tell her when to start and stop stitching, but hey, you have to start somewhere.

Well, after riding the high of finishing her first quilt, she wanted to make a second one for my dad. We went with the same design as the first one to keep it easy.

We wrapped these up and sent them to my parents in the “birthday box” for my mom, and they’ve put them in the Fancy Cabinet of Doodads.  The thing on top of them is a box my aunt made out of plastic canvas - it’s kind of cool.

Well, having all those victories under her belt, I asked if she wanted to make a doll quilt for a friend of hers who is having a birthday party this weekend. She said no, but that she wanted to make her a stuffed animal instead.

Bloomer has a pink fleece owl I made her when she was two and needed something for “O” week at daycare, so she asked to make an owl. We cut out the the owl shape from pink fleece, and she picked out the fabric from the scrap bin for the belly and inside of the wings. This was a bit trickier to sew because of the curves, and she got introduced to our friend: the seam ripper.

She got a “My First Sewing Kit” for her birthday last weekend with some hand sewing projects in it, so I’m hopeful she’ll want to work on those in the coming weeks to learn more about hand construction techniques.  The important thing, I think, is letter her guide what she wants to work on so she stays interested, and not put pressure on her. It’s difficult for me to not to guide her completely in how I would do things, so we’re both learning.

Weekend Progress

I’ll do my Sunday Stash report in a bit - there’s a chance I’ll finish some more things to count, so for now here’s some of the things I’ve finished the past couple days.

Saturday Sampler Blocks

I got block 7 for Going Coastal (on the left) and the first block for the new program called Royal Gardens (on the right). For the new program I went with the purple colorway. It reminds me of my high school colors (purple and gold! Go Monarchs!), but hopefully that similarity will abate somewhat as time goes on.

Going Coastal - Block 7 Royal Gardens - Block 1
Car Wallet

I made this as a “big brother” present for my cousin’s son.  My cousin’s wife is pregnant with a little boy and due the same time as my sister.  I made the Robot Love quilt for the baby, but wanted to send something along for their first son, too, so  her wouldn’t feel left out with the new baby coming.

Car Wallet

Car Wallet

I had a piece of Cars fabric in my stash from when I made my son shorts and my daughter a sundress about 6 years ago, which I used for the outside cover.  I used this tutorial as the base, but added some top stitching around the edge and where the folds of the wallet go. I also added fusible interfacing to the exterior piece and dog-eared the corners for the top flap.

If you’re not familiar with the Cars toy cars, they are slightly bigger in scale than Matchbox cars.  These cars are a little loose in the wallet, so if I were making one for Matchbox cars, I would make the wallet a bit smaller, or divide the pockets into 5 pockets instead of 4.

Fred’s New Coats

Fred's new coat

I made Fred two coats for the chilly weather (just in time for it to be in the 70’s here the last couple days).  Here he is modeling one of them. The other one I made is a black background with footballs on it.

I think it’s fairly accurate to say he’s channeling Ralph from the bunny suit scene in A Christmas Story.

Bloomer Makes Quilts

My daughter, who will be seven in week (!!!!), made two quilts this week. They are on the small side, and I had to help, but she was excited to start and finish the projects. No pictures of the finished projects yet, but here’s a picture of her sewing machine, a Janome Sew Mini, and the desk she’s using as a sewing table.  This desk was my mom’s when she was growing up, so it’s got good vibes.

One of my future projects will be to make a carry/storage bag to keep her machine in when it’s not in use.