I am happy to show off the Peas and Corn Lunch Bag, by Sara Lawson of Sew Sweetness. As you may remember, I made her Aeroplane Bag and the Petrillo Bag and the Velocity Girl Bag as well, and this pattern had her hallmark easy to understand directions and good photos to accompany the words.
Sara’s pattern calls for oilcloth or PUL fabric for the interior, but I get a little picky about things matching the way I want, so I used iron-on vinyl to make my lining pieces easy to clean. This is also a great option for the bottoms of regular bags to make them easy to clean! Here’s how I did that.
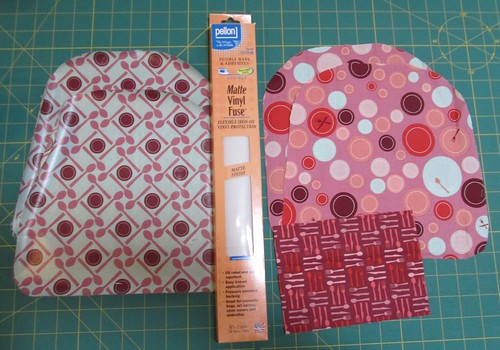
First, I cut out all my pieces. Here are some of them laid out next to the package of iron-on vinyl I got at JoAnn’s - it’s a 15″ x 2 yd package, so there’s plenty or the next project.
I used the pattern pieces to cut out the vinyl as well. I will recommend cutting a little larger than the pattern for both the fabric and vinyl pieces you want to have fused, and then trimming to size once fused because I did notice a little shrinkage after fusing the vinyl.
Next you peel the release paper off the vinyl. On an applique pressing sheet, or other piece of release paper, lay the fabric right side up, and then vinyl sticky side down. Your vinyl may want to curl up like mine, but that’s okay.
Set your iron to a medium heat and cover the layered pieces with the release paper from the vinyl. Press firmly over the entire area for 5-8 seconds. Sometimes I play music and do a little in-place dance while doing this. That’s an optional step. Let cool and pull the release paper off, then trim your pieces as needed.
I used the matte finish instead of glossy because I didn’t want my lunch box to look like that scene in Pulp Fiction when they finally open up the briefcase and are blinded by the glare.
Here’s my bag inside-out to show the binding on the interior and how the vinyl pieces look.
And here it is right side out, but unzipped.
Very cute Pam!
That is really cute! Thanks for sharing. Any tips sewing on the vinyl? I know there is something like tape or wax paper you can put on the presser foot but I can’t seem to find where I saw it.
Hey Amy- when sewing on the matte vinyl I didn’t need a special foot - my regular one worked fine. When I’ve used the gloss version, I needed to put scotch tape on the underside of my presser foot, or put a piece of tissue paper over where I’m sewing.
Hey! Thanks for trying out the vinyl. Now that you have done it, it won’t be so scary for me. 😉 I appreciate the instructions with photos. Did you see any difference in the color of the fabric on which you pressed the vinyl? I have heard it changes the color. Thanks for the tip on cutting everything a little bigger.
Very nice lunch bag and your tut was very good too. I’ve never put vinyl on anything, but you made it sound easy enough that I may try it in the future.
Man, I’m so gld you posted this! I plan to make a new lunch bag for my son, and was only mostly happy with the best free pattern I’d found. This one looks much better (and I do have PUL) to use thanks to the diapers I had big plans to make while pregnant, and no energy for after his birth.