Monthly Archives: March 2013

Sunday Stash: Huzzahing

Of course finishing the Easy Street quilt really packs a punch to the old stash! And the 1 yard cherry on top for the storage bag doesn’t hurt. I also whipped up that little mini Quilty Realness piece and finished the Aeroplane bag for my daughter’s sewing machine.

I won’t attribute the usage for the Jingle progress since it’s not a completed project yet, but that was some nice usage as well.  I’m expecting some more Kona Snow for that project, so that should be in within a couple weeks. But for now, no additions!

  • Used this Week: 23.75 yards
    • 19.5 yd for Christmas Road
    • 1 yd for Christmas Road storage bag
    • 0.25 yd Quilty Realness mini
    • 3 yd for Aeroplane bag
  • Used year to Date: 127.5 yards (Holla! Broke 100 yards!)
  • Added this Week: 0 yards
    • Woohoo!
  • Net Used for 2013: 56.5 yards
  • YTD Used for Charity: 69.5 yards (55% of total used)

See more stash reports at Patchwork Times!

Aeroplane Bag (with comparison to Weekender)

Since going on the Weekender bag-making frenzy last year, I did have plans to make some travel bags for me and my kids.  I was sort of dreading making another one, honestly, although had the supplies to do so.  Imagine my delight when I saw Don’t Call Me Betsy say she had planned to make an Aeroplane bag from Sew Sweetness, and the shape, although different from the Weekender, was cool and retro.
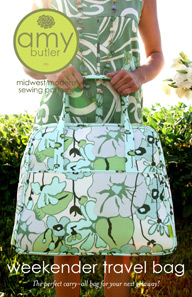
 

I read over the Aeroplane bag pattern instructions (available at PDF), and they seemed relatively straight forward.  Handle construction is the same for both. For the Weekender, there are entire top/bottom assemblies attached to side panels. For the Aeroplane, two flat pieces are sewn together, and given shape with darts and gussets, which are more familiar (to me, easier) ways to construct a bag.

Here’s my (first) finished version of the Aeroplane. I had this twill fabric in my stash, intending it for a bag someday, and the khaki is a heavy twill leftover from the Weekender I made my mom.

The bottom of the bag has about the same stability as the Weekender as it does have Peltex sandwiched between a layer of Shape Flex interfacing and the outer fabric. The top of my bag is floppier than Sara’s because I only used fusible fleece instead of the sew-in thin foam (it’s what I had on hand). In the future, I would make it less floppy this by adding a layer of interfacing in addition to the fusible fleece.

My interior is a quilting weight cotton backed with Shape Flex, per the instructions. I skipped the interior zippered pockets since this version was meant to hold containers for other stuff already so they wouldn’t be needed.  The instructions for it were clear, however.

For me the trickiest part was the zipper. I’ve been putting in zippers for 25 years, so zippers themselves aren’t the problem, but the particular zipper I had was a parka zipper, which is a bit bulkier than needed for this application.  That made it hard for me to get my zipper ends tapered the right way since it had a double pull, but that can be easily fixed by not using a parka zipper next time.

I made the regular size for my daughter’s machine, and it fits perfectly!  I do plan on two more versions of this bag: one will use home dec weight fabric to make an overnight bag for my daughter, and the other will be the long version (it looks like it’s 2″ longer) done in patchwork for me to use. Both of those will have the interior zippered pockets, and I’ll make them a bit stiffer by adding the extra interfacing to the back of the fusible fleece.

I think I might also add an exterior pocket between the handles on one side for my version, so I’ll talk about that process once I do it. Additionally, if you want to make the bottom even a little more sturdier (to hold a heavier sewing machine), you can add a false bottom with a piece of old cutting mat covered in the interior fabric.

So, if you’re looking for an overnight bag pattern and intimidated by the Weekender, I highly recommend the Aeroplane Bag. Heck, I’d recommend it anyway! Sara has a great blog post with lots of other examples on her blog.

Jingle Progress: All Caught Up

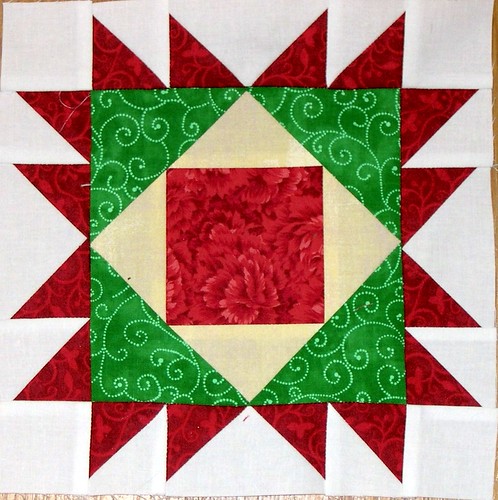
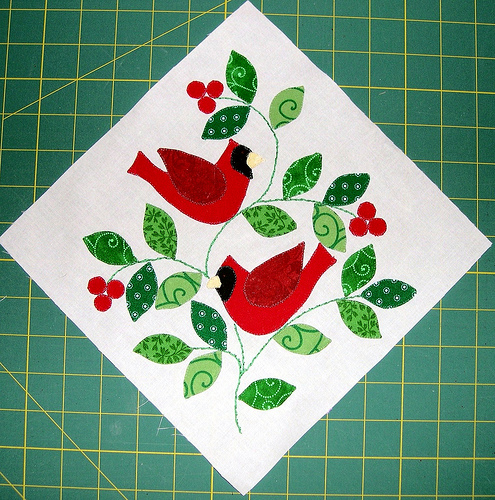
I managed to finish up the two applique blocks for Miss Jingle, so I’m all caught up now! Huzzah. And that’s despite contracting whatever virus my son had earlier in the week.

 Jingle Applique Block 1

Some of those berries are near to having corners, but I figure that’s what they get for 3/8″ in diameter.

Jingle Progress

Well, I finished stitching the center medallion for the Jingle quilt today, and I’m quite pleased with it.

Those berries are killers to stitch. Bleh. But, they are done! Huzzah.

I also whipped up the first two pieced blocks rather quickly since those are mostly HSTs and flying geese.  I had thought these blocks were 12″, but it turns out all the framed blocks actually finish at 9″ instead.

 Jingle - Pieced Block 2

I mentioned on this morning’s podcast that I had the shapes traced for the two published applique blocks, so I’ll keep working on those this weekend. I have one of them ready to stitch since it was a very slow day at work with most of my team on vacation.

HtbaS - Episode 123

This week I talk about finishing Christmas Road, being delighted in quilting, when to trash a project, and give some book reviews.

Play

WIP Wednesday: Jingling Along

Since I finished up my arty little piece and a big ol’ giant quilt, I finally buckled down and started on the applique for the center medallion for Miss Kringle (I’ve been calling it Miss Jingle on the podcast, so I guess that it’s name now?).  Here’s all my parts so far - I’m only lacking 12 berries and the stems. Those pieces are cut, so once they are prepped, I can glue down the center medallion (on Kona Snow) and get stitching on it!

Erin has released two applique blocks and one pieced block (the second pieced block is due out any time now), so I’ve still got some catch up to do, but the having the center done will feel GREAT.

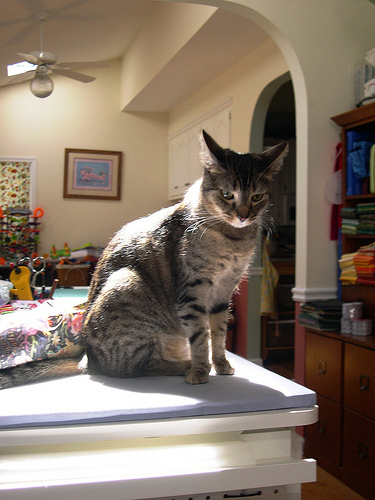
Morelli has many feels about National Quilting Day.Since I can mix up the piecing and the applique with the blocks already published, I think I’ll keep going on this project until I catch up.  After that I’m working on the Labyrinth quilt, I think. Or whatever strikes my fancy!

Meanwhile, this one is full of the Feels. He keeps taking off with more yo-yo’s, and has been eying my stack of applique pieces. He’ll turn ONE in a couple weeks, which I can hardly believe.

Too Big to Fail. Or Photograph. (Christmas Road - Finished!)

I present my finished Bonnie Hunter Easy Street Mystery Quilt, aka Christmas Road!

There’s a row at the top you can’t see because I had to lop it over the railing on my back porch (which is 10 feet off the ground, that’s how big this thing is!), and the finished measurements are 110 x 110″.  I did an extra row and column of blocks over Bonnie’s pattern so it’s a 5×5 layout, and added a 3″ border of my “constant” to finish it off.

I quilted it in an all-over pattern since the piecing is so busy. So many thanks to Lynn for letting me use her long-arm to finish it! It took 4 1/2 hours over all to quilt the entire thing (that includes loading and unloading it on the frame).

The back has a center burgundy panel that is 110″ x WOF. It’s flanked by two side panels comprised of different scraps of hunter green, with more hunter green scraps for the binding. I made a dent in my stash, but still have quite a bit of hunter green stashed!

I made a storage bag (out of hunter green, OF COURSE) to keep it in, and will give it to my in-laws before Christmas so they can “decorate” with it this year.

On Delightful Quilting

Remember when Sandy did her quilty resolutions contest, and I said I wanted my driving word to be “delight“?  This week has been a wonderful example of making progress on using that word.

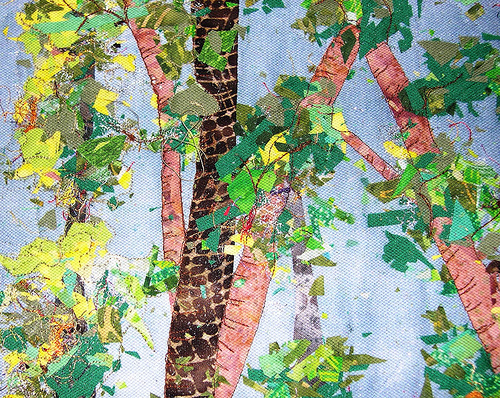
I had high hopes for the landscape quilting class I took a couple weeks ago.  It uses a “fabric confetti” technique to create a landscape.  Because we didn’t have sewing machines in the class, the instructor provided us the background fabric with Steam a Seam attached to it, and then we placed our trees and confetti leaves on it, added another adhesive (the Bo Nash sprinkle kind), and then a layer of tulle and then pressed the heck out of it to seal in all those little pieces.  Here’s what mine looked like when I left the class.

After reconsidering, I carefully pulled back the tulle and added more leaves in some different greens from my stash at the top of the piece, and a little more ground cover at the bottom. I sandwiched it with my standard 80/20 and a piece of muslin for the backing, and started thread painting this weekend.

Bummer.To my disappointment, the amount of adhesive on here gums up my needle after 3 stitches.  I was getting skipped stitches left and right while trying to accent the tree trunks, and it only worsened when I tried to do the leaves.  I had started using my monofilament, and then a 12 weight variegated Sulky thread (both with a size 90 needle and a top stitch needle), and when those combinations failed, I went to a shade of brown in my trusty Aurifil. Even with 3 different needles (universal size 90, topstitch, and size 90 embroidery needle) and the 50 weight thread, the stitches were still skipping and looking horrible.  I was stopping to wipe the needle down with a cotton ball soaked in alcohol every 5 minutes or so and it’s just a miserable process.

I have heard of a product called “Sewer’s Aid” that’s a silicone based lubricate of sorts you put on your needle to help keep the adhesive from gumming it up. I might try that if I can find it, but otherwise, I’m trashing this project. It’s just not delighting me.

I will try the technique again, but only here at home where I don’t have to secure everything with so adhesive to transport it.  I think I might try a smaller forest scene since I still have lots of the different green confetti left, and some browns for tree trunks.

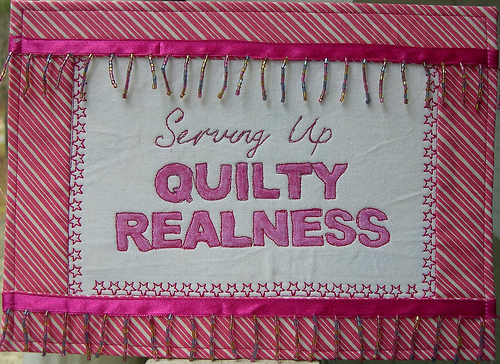
Since that was such a disappointment, I was very happy to work on this fun piece (after finishing my Easy Street quilt - holla!).  It’s inspired by a love of RuPaul’s Drag Race that I share with some of my guildmates, as we discovered at our sew-in last week.

Serving up Quilty RealnessIt measures about 7×10″.  The words are threadpainted/FMQ’ed onto Kona White backed with a piece of Peltex instead of batting so it would be stiff enough to stand up on it’s own.  I used my watercolor pencils to fill in the letters, and a decorative stitch to border it.

This delights the heck out of me.

Sunday Stash: Hot Stuff

So this happened:Here's the pile of fabric I landed on...

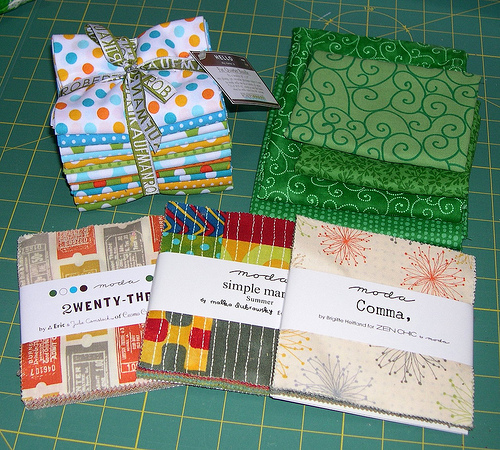
I call this the pile of fabric I landed on when I fell off the fabric diet wagon.  Oh well - my friend Andi was having a really good sale on precuts so I had to indulge in 3 charm packs and a FQ bundle of the Beach Ball colorway of the dots line. In my defense, it’s my attempt to continue to balance out my stash with more warm colors.  The greens in the upper right are specifically for Miss Jingle since I apparently had no medium greens (just hunter and lime, and not much in between).

My Favorite Bag - in Lavender

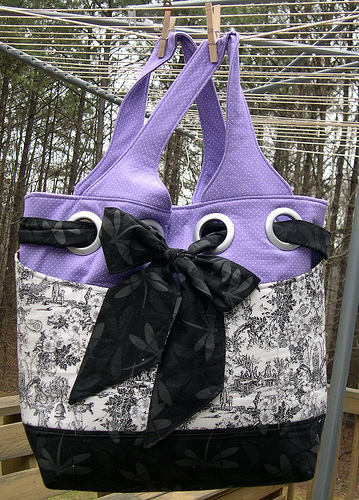
I did make progress this week, though so I’m still in the positive on using fabric from my stash. In addition to the Monster Mash baby quilt and Namaste mini, I made another My Favorite Bag for a commission for our niece’s friend.  I also finished a skirt for my daughter (no pics yet - trying to catch her in action).

Just today I finished a casserole carrier using a charm pack of Kate Spain’s Good Fortune and some solid orange and grey fabric.  With that bright orange inside, it’s a little safety-vest-ish, but I love it anyway.  I made it for a 9×13″ dish this using this tutorial, and instead of the Insul-Bright, I had some cotton batting and the teflon ironing board fabric (the silver stuff) that I combined instead.

Now, the reckoning!

  • Used this Week: 11 yards
    • 2.75 yd for Monster Baby quilt
    • 0.75 yd for Bloomer’s Mario skirt
    • 3.75 yd for purple Favorite bag
    • 1.25 yd for storage bag for Scrappy Swoon
    • 0.25 yd for Namaste mini quilt
    • 2.25 yd for casserole carrier
  • Used year to Date: 103.75 yards (Holla! Broke 100 yards!)
  • Added this Week: 7.5 yards
    • 3 yd for Beach Ball Dots FQs
    • 3 yd for 3 charm packs
    • 1.5 yd of green for Miss Jingle
  • Net Used for 2013: 32.75 yards
  • YTD Used for Charity: 69.5 yards (67% of total used)

See more stash reports at Patchwork Times!

These two crack me up.

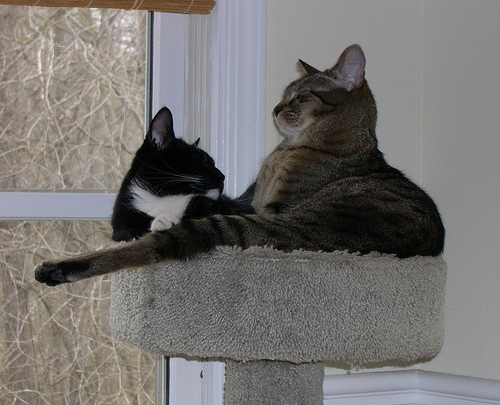
Here is a random picture of Jett and Morelli from this week that cracks me up. They both look so smug about piling on top of each other.


HtbaS - Episode 122