Monthly Archives: April 2013

Sunday Stash - Nothing Ventured, Nothing Gained

No finishes! Everyone clutch your pearls in horror.  Meanwhile, the last two blocks are finished for the Beachwalk Quilt (picture quality is crap as my camera is apparently disintegrating before my eyes):

Next week should see the finish of the signature quilt for my daughter’s teacher as I take a step back from these intense applique blocks.

  • Used this Week: 0 yards
    • Sad trombone!
  • Used year to Date: 144.5 yards
  • Added this Week: 0 yards
    • Woohoo!
  • Net Used for 2013: 76.75 yards
  • YTD Used for Charity: 69.5 yards (47% of total used)

See more stash reports at Patchwork Times!

HtbaS - Episode 127

WIP Wednesday: Blowout

I’ve been working on Beachwalk steadily, and have two more blocks finished,and am cutting out the parts for Block 7.  The end is nigh!

Block 5

Block 6

Beachwalk Block 6

And my monorail cat appears to have had a blowout.

Monorail Cat Blowout

WIP Wednesday at Freshly Pieced

Sunday Stash - The One With Crabs

Beachwalk Block 4

Well, when working on a large, slow project, the yardage doesn’t exactly get used up all that quickly when you account only for finished projects.  I’m enjoying the McKenna Ryan Beachwalk blocks immensely, and finished block 4 last night (see crabs to the right).  Block 5 should go quick since it’s just umbrellas on a beach -famous last words!

I also finished step 1 and part of step 3 of my Easy Street Redux quilt, so I only have a satifyingly large pile of 4 patches to knock over, but no numbers in the spreadsheet for it.

  • Used this Week: 3.25 yards
    • 0.5 yd for vinyl window pouch
    • 1 yd for bed caddy
    • 1.5 yd for mixer cover
    • 0.25 yd for various projects my daughter did
  • Used year to Date: 144.5 yards
  • Added this Week: 0 yards
    • Woohoo!
  • Net Used for 2013: 76.75 yards
  • YTD Used for Charity: 69.5 yards (47% of total used)

See more stash reports at Patchwork Times!

HtbaS - Episode 126

I talk about making bags, appliqueing the Beachwalk quilt, and procrastinating through productivity.

  • I recommend the Sarah Graves “Home Repair is Homicide” series if you like old houses and murder, or something like that.  Book 1 is “Dead Cat Bounce” (note: no actual dead cats in there).
  • My new niece is here! I don’t want to share her name or pictures until I get permission, but here are pictures of my kids as babies (both at 6 months old - my son on the left and daughter on the right). New Niece looks pretty similar to them, if a bit smaller:

They are both laying on quilts my MIL made them.

Play

Beachwalk Blocks 1-3

I’ve made a bit more progress on the Beachwalk quilt, and I’m loving it more and more.  Here is block 1 with block 2 now appliqued on the other side (the block still needs trimming):

Oh, you’d like a picture without a giant cat on it? Well, so would I. Guess we’ll all have to learn to live with disappointment.

It is necessary to clean one’s toes while one’s mother is attempting to trace shapes.  Or have a kitten party.

Except I guess they aren’t kittens anymore, since Nina turns one in a couple weeks. *sniff*  I think like Zoom, though, she’s going to retain her kitten-ness for the rest of her life since she’s only about 7 1/2 - 8 pounds.

After shooing the cats off, I finished block 3 as well:

Beachwalk Block 3It measures 10 x 33″, and has lots of satifyingly chubby sandpipers.  The next block has about a bazillion crabs crawling all over a sandcastle.

WIP Wednesday: Beachwalking

I finally buckled down and started the actual applique for the Beachwalk quilt. Of course I first had to sort out the fabric from the kit and label and organize all of them, and then pull out the fabrics for the first block, and then pick the best coloration within the fabric for the individual applique pieces.  But then! It all comes together and voila!

Now before you think I’m really bad at centering, Block 2 gets appliqued on the left hand side there.  I’ll work on that one next.

When I’m sick of applique, I’ll take a break to put together the top for the signature quilt for my daughter’s teacher.

WIP Wednesday at Freshly Pieced

Small Finishes with an Accidental Rant

I said on twitter that there’s nothing like a big applique project looming to inspired one to tackle a lot of little projects.  So here’s some small projects I finished lately.

I’ve been meaning to make a mixer cover for a while now, so I took out my gingham/cherry fabric and tackled it using this tutorial. Rather than add piping and have raw seams on the inside, however, I sewed the quilted panel with interior sides together, and then did a traditional quilt binding on the exposed seams, which mimics binding.

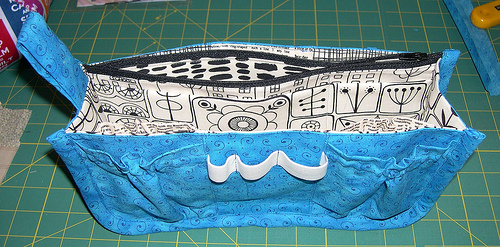
I also had a pattern for a zipper pouch with a vinyl window I’d been meaning to make, so I made it with the same fabrics I used for the purse insert. I’m not linking to the pattern designer because it was HORRIBLY written.  I got three steps in and just made it up myself because the directions made ZERO sense. I ended up sewing the two sides together and then overlocking the seam so you can see it through the window, but that was about the best I could do.

You’ll note I staged the photo with a rotary cutter and seam ripper because that’s apparently all people carry in see-through pouches?  I was Googling tutorials to get ideas on how to finish it once it was clear the pattern was crap, and that’s all anyone had in their pictures - rotary cutters and seam rippers. I’m sorry, but I don’t view a rotary cutter as one of those super-portable tools I’d haul around for hand piecing. Sheesh. Maybe I should have staged mine with mini bar bottles and spare tampons?

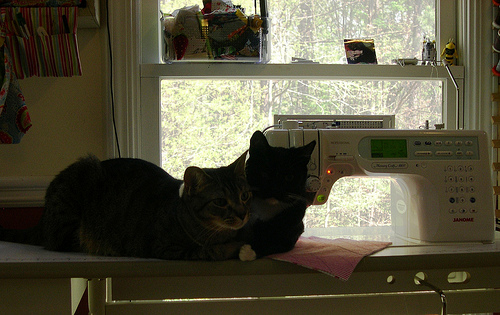
Sorry, writing about sewing that pouch got me all riled up again.  Here are pictures of cats to sooth us all again.

He does actually fit in there

Boyz being Boyz

Sunday Stash - Purse-suant

Some nice usage this week with the Labyrinth quilt and my Petrillo bag and new purse insert.  

Purse Insert

I decided that I needed the purse insert since the Petrillo bag only has two interior pockets, and I’m used to a couple more, at least for cell phone and notepad.  I’ve had this pattern from Studio Kat for a while, and the large size was perfect for both the Petrillo and the Vera Bradley bag I use on vacation at the beach.  I didn’t pick the colors to match any particular bag, so the black & white prints from Summersville work great.  I’d recommend the pattern if you have a lot of patience and good organization; there’s a bunch of pieces to keep track of.  The instructions are well written, but you need to read them a couple times before sewing.

I did finish that final pie pan holder, and couldn’t resist this applique from the hunky patriots fabric I still have some pieces of in my stash.  I’m sure my MIL will appreciate it, although the family didn’t really need another reason to eat more pie to get the bottom of the pan.

  • Used this Week: 14 yards
    • 8.25 yd for Labyrinth quilt
    • 2 yd for pie pan holders
    • 2.5 yd for Petrillo Bag
    • 1.25 yd for purse insert
  • Used year to Date: 144.5 yards
  • Added this Week: 0 yards
    • Woohoo!
  • Net Used for 2013: 73.5 yards
  • YTD Used for Charity: 69.5 yards (48% of total used)

See more stash reports at Patchwork Times!

Petrillo Bag - Finished!

I told you guys I worked fast!

I’m not sure I made the best choice with the  BRIGHT orange fabric, but I wanted to use my piece of Sew Stitchy for the flap (it’s got little stick pins scattered all over it).  I was afraid using too many greys would be bland, but I’m thinking I might add a little hexie embellishment or something between the straps to take away some of the orange-ness.

Some thoughts and tips on making the bag:

  • I used a combination of Pellon Fusible Fleece and Pellon Decor Bond heavyweight interfacing instead of the Soft & Stable recommended in the pattern.  Since my products were fusible, I didn’t have to baste anything, just fuse it, and I’m happy with the crispness and body in the bag.
  • In the pattern there is a call for a 6-3/4 x 10ish” for the false bottom - I didn’t see where this piece was used in the construction of the bag since the false bottom is actually made out of a different size cut.
  • When sewing the sides of the bag to the front/back piece, I found it easiest to pre-notch the side pieces where the bottom curve is by 1/4″-3/8″ (it’s a 1/2″ seam), and sew with the tear-drop shaped side pieces on the bottom when stitching.
  • Petrillo BagWhen finishing the bag by top-stitching the opening, I had skipped stitches over the part with the flap because of all the layers when using a regular universal needle (it was probably time to change the needle anyway).  When I switched to a top-stitching needle with a bigger eye, it worked beautifully.
  • I used regular magnetic clasps rather than the sew-in kind.  I’d suggest altering the placement a bit from the directions if you’re doing the same since they are a bit bigger than the sew-in ones.  For the main flap, I’d raise magnet up 1/2″ on the body of the bag (no change to the magnet on the flap itself).  For the padded pocket, I’d lower the magnet on the pocket by 1/2″ (keeping the placement on the interior flap the same).