Monthly Archives: February 2013

WIP Wednesday: Cluck

Remember last time I listened to my brain? After a whirlwind week last week where I plodded on small projects, the logical part of my brain knew I needed to start cutting for either the Labryinth quilt for my son’s bed, or Miss Jingle. However, (ugh - just remembered my 10th grade English teacher telling us that you’re never supposed to use “however” to begin a sentence), the other parts of my brain did not want to cooperate.  After disregarding the 40% logical part, the 20% that wasn’t focused on craving chocolate was thinking back to organizing my sewing room over the weekend and the glaring fabric that has no purpose in my stash.

Namely, chicken fabric.

My brain: Cluck

Me: No. Mazes. Cardinals.

My brain (whining): But it’s for chariteeeeeee…

Me: Ugh. Yes, but we already have 5 tops for Jenny, and she’s going to think I’m nuts.

My brain: BOCK-BOCK-BOCK-BA-GOCK!!

Me: Fine. E-I-E-I-O.

Yes, I had at least 3 different chicken fabrics. I actually had a fourth in tans, but it didn’t really fit in with the others.

The pattern is called “Topsy Turvey” and it’s one of those “3 yards of fabric makes a quilt top” patterns from Fabric Cafe.  It’s about 44×51″ finished, so a nice lap size.

Anyway, that was a WIP. And of course Nina helped. I suppose she hasn’t yet learned not to sit on chicken wire (fabric).

And now you can't get that song out of your head.Anyway, I’m also working on two other nap mats made out of orphan HSTs, three pillowcases, and a little thing out of this fun thing.

WIP Wednesday at Freshly Pieced

Sunday Stash Report - Slow and Steady

I am finishing up the Baby Shower in a Box for my sister this weekend, but alas! will not be shipping it to her until the week after next so I can show off the booty to my guildies next Sunday. I think I’ll do the blog post on it this coming week since all the bits will be done today once I put finishing touches on the Big Sister gift for my current niece (don’t want to call her the “old” niece- blarg).

All the non-baby shower sewing was charity related so I am really kicking butt there.   finished up 2 more Bricks tops this week, and cut a bunch of leftover strips from the same fabric I used in the tops to making binding for the group to use. I ended up making around 1,200 inches of binding, which is enough for all five Bricks quilts.

I also spent a couple days this week cutting my scrap basket contents into my usable sizes. That doesn’t count in stash usage, but it does make me feel better to clean out that basket!

  • Used this Week: 10.75 yards
    • 4 yd for 2 more Bricks tops
    • 1.5 yd for 2 more nap mats
    • 1 yd for fleece bed covers (filled up two pet beds with scraps!)
    • 1 yd for case for the AMQG raffle quilt
    • 2 yd for binding for Bricks quilts
    • 0.5 yd for new niece’s decoration
    • 0.75 for Big Sister gift for niece
  • Used year to Date: 64.5 yards
  • Added this Week: 0 yards
    • Woohoo!
  • Net Used for 2012: 13.5 yards
  • YTD Used for Charity: 42.75 yards (66% of total used)

See more stash reports at Patchwork Times!

HtbaS - Episode 118

Another week of not much sewing or blogging - sad trombone! I did attend a meeting for a new (to me) guild, met a listener, give a book review, a recipe review, and talk about how to prep your quilt top for a long armer to quilt.

Here is my block for the Atlanta Modern Quilt Guild “Quilt Block Throw Down” - it had to be inspired by the classic pinwheel block. Not sure how well you can tell, but it’s 3D!

PinwheelsAnd here’s the Crockpot Lemon Chicken recipe I talk about.

Play

Sunday Stash: Back in Black!

And there was much rejoicing! I have successfully used up enough yardage this week to push myself back into the positive on stash usage.  I finished up 10 nap mats for Good Mews (using them as leaders & enders for making the Bricks tops).

Nap Mats for Good Mews

Pictures of 2 of the 3 Bricks tops have been added to the tutorial post on the Bricks block.

All of that sewing is for charity, so my Charitable portion is looking good as well.  A great week all around!

  • Used this Week: 13.25 yards
    • 7 for 10 nap mats
    • 0.25 yd for quilty gifts for a friend
    • 6 yd for 3 Bricks tops (measuring 54 x 54″)
  • Used year to Date: 53.75 yards
  • Added this Week: 0 yards
    • Finally!
  • Net Used for 2012: 2.75 yards
  • YTD Used for Charity: 33.25 yards (62% of total used)

See more stash reports at Patchwork Times!

HtbaS - Episode 117

I talk about the never-a-dull-moment-ness of pet ownership, finishing some nap mats, a brief run down on the quilted picnic placemat tutorial, and the Bricks quilt block pattern.

Special bonus picture of my daughter’s first Halloween costume, which is now passed on to my pending niece!


Play

Bricks Quilt Block Tutorial

I mentioned in the podcast a couple episodes ago that I was working on a Turning Twenty inspired block that would be more suitable for smaller projects like baby quilts or lap-size quilts.  I love the simplicity of T20 quilts,  how quilt they come together, and the ability to show off large scale prints. I didn’t love how off balance it can be if you try to use it in a smaller project than twin size quilt.

This block finishes at 9″, and is still easy to cut and piece.  This is what the blocks look like:

And here’s the cutting plan for three different fabric sizes!

Fat Quarter

Fat Eighth

Layer Cake

With 9″ blocks, a layout of 6 blocks by 7 blocks will yield a quilt top that’s 54 x 63″, which is a nice size lap quilt.  You could make that with 14 fat quarters (getting 3 of each block element from each FQ), 28 Fat Eighth’s, or a layer cake set with 42 10″ squares.  To assemble the top, just start laying out your A Blocks and B Blocks in a random pattern until your happy with the placement of the values and colors:

Bricks Top Layout

Enjoy!

Edited to add pictures of two finished tops with a 6×6 block layout - these measure 54″ inches square:


WIP Wednesday: I Get By With A Little Helper

This has been a particularly frustrating week at work so I’ve not been making progress at much of anything because of a horrible, no good, very bad mood. I’m trying to make progress on small projects to give me the endorphin rush of finishing stuff, so I’m trying to tackle 5 more nap mats for Good Mews.  Here’s one of them - the other four are quilted and waiting to be bound.

In other news, Fred was feeling a bit under the weather so he stayed home with me today. Much like when the human kids are home sick, there’s a lot of quilts involved. With the human kids, we tend to make a blanket fort to convalesce. With Fred….

Fred is playing King of Quilts

… I let him play King of the Quilts.

Refinished Kitchen Hutch - Finished!

Several years ago I got it in my head that I wanted a hutch for my kitchen. The catch was it had to be small enough to fit on this one particular wall next to the bathroom door, so I spent a couple weeks trolling Craigslist for something that would suit my needs, and that I could refinish if needed.

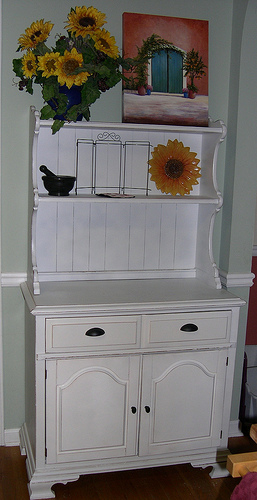
I found this lovely example of 80’s Country Chic for $25. Surely much dusty-rose colored flowers adorned this at one time, but I don’t really “do” hearts on furniture.  And there were hearts EVERYWHERE. That thing on top, etched into the hardware…. bleh.

But it had the characteristics I wanted - lots of storage underneath, some decorative shelves up top, and a drawer that would become my husband’s “junk drawer” so he wouldn’t spread his wallet, chapstick, loose change, phone, receipts, nail clippers, and papers all over the kitchen island.

And it was only $25!

Kitchen Hutch - Before

The previous owner was very apologetic about the scratches and wear on it - I told her not to worry since I was going to refinish it.

For those that have never refinished furniture before, you need sander/sandpaper/sanding blocks, patience, some basic tools, and a dust mask.  I removed that top piece with the heart on it, and took off all the hardware and stuck it in a baggie. That meant I had 5 pieces to refinish - the base, the hutch, 2 doors and a drawer.

Refinished Kitchen Hutch
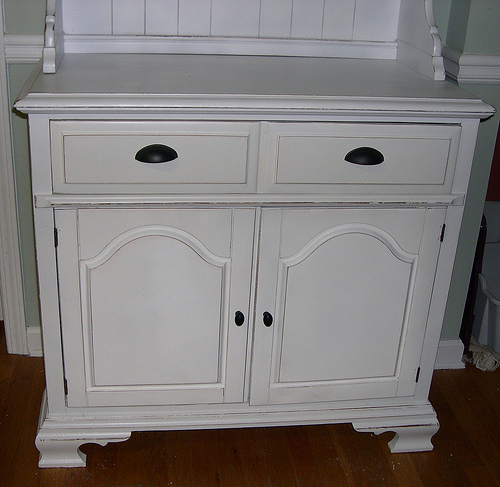
I used an electric sander to take off the existing finish (wearing a dust mask), and then I spray painted the pieces with a flat white paint.  I wanted it to look hand-rubbed and not glossy when done, which apparently I didn’t communicate to husband well because he stepped in a spray painted it for me with HIGH GLOSS white. So I had to re-sand it. And then spray paint it with flat white. After I did my edge finish technique (more on that in a bit), I coated the whole thing with 3 coats of matte clear coat to protect the wood. I got new hardware for the drawer and door knobs (keeping the old hinges because those are insane to try to replace with a different type). And voila!

The total cost for this, after the $25 to buy it, and hardware and spray paint and clear coat, was maybe $50 total. We had all the tools already, so it was definitely worth it to get a piece of furniture I’m happy with, even if it took me a couple years to finish the dang thing. Apparently I got distracted by making quilts? And now that it’s done, my husband can once again park in the garage again.

I like the look of the pre-worn edges on furniture, especially when they are going to be in a high traffic area like a kitchen. To get this look, after you get all your base coat of paint on the way you want, you take a sanding sponge and rub the edges where wear would naturally occur. Then I used a stain marker (in cherry), and colored in the edges a tad darker than natural color, wiping off any extra stain before it dried on the white paint.  I got the idea from this tutorial from Ana-White.com, which is great for DIY woodworking projects.

The added bonus of this finish is that when you are hauling this up the basement stairs by yourself (with the help of your seven year old daughter, of course) because your husband is still recovering from shoulder surgery, you can bang the crap out of it against the stairs all you like and it only adds to the natural wear.

Refinished Kitchen HutchI haven’t quite worked out exactly what I want to keep in the bottom yet, but I’m sure it will fill up by the end of the week. The junk drawer is already getting full!

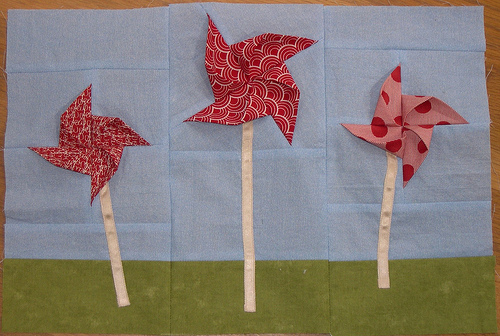
Naturally, I need to make a runner for the top, and for the triple mini quilt frame you can see on the middle shelf in the picture of the entire hutch. In fact, I probably need to make multiples so I can switch them out!
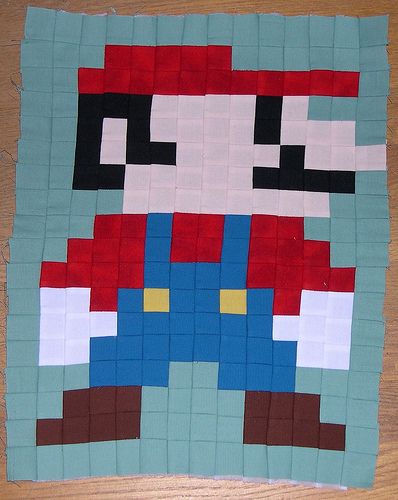
Quilted Picnic Placemats - Finish and a Mini Tutorial

Well, I forgot to take pictures along the way, but you’re in luck because quilted picnic placemats are much the same as regular placemats with two exceptions. Mine measure 15×18″, and are machine quilted and bound.  You can, of course, use pre-quilted fabric cut to size but I didn’t have any of that in my stash.

Thing 1: A set of 2 ties sewn into the edge of one side.  You can see from photo above that the ties are about 1/3 of the way up one side.  I placed them here so I could fold over the top of the placemat to keep the utensils in place. That way you fold over the top, roll it up, and tie it closed.

Thing 2: A small divided pocket for aforementioned utensils to slide into.  I stitched my pocket so two edges are under the binding (thus saving me from finishing two additional edges!). I believe my pocket piece measured 5″ x 12″, folded in half WST and stitched down on one side so I had two finished edges (the fold and the stitched edge - the fold is on top in the picture, and the stitched edge is the left side of the pocket). I trimmed the corner, flipped it right side out and stitched it down. Then attached the binding on top of it.

Sunday Stash: Further Down the Rabbit Hole

I took the red pill, and am discovering just how far down the rabbit hole goes. I ordered some Christmas fabric for my Christmas BOM, so I had to count that, but my usage hasn’t quite caught up yet. Since I think that’s it for fabric purchases for some time, I’m not freaking out.*

*Okay, maybe I am a little.

Anywho, two projects finished this week - the baby quilt for my new niece and some quilted placements for my daughter’s class Bingo basket for school. Pics of the placements with a mini tutorial tomorrow. Pics of the baby quilt when either I get permission to post them, or when the package arrives at my sister’s house so I don’t spoil the surprise!

  • Used this Week: 5.75 yards
    • 4.5 for the baby quilt
    • 1.25 yd for 2 quilted placemats
  • Used year to Date: 40.5 yards
  • Added this Week: 9 yards
    • 9 yards of red and green Christmas fabric
  • Net Used for 2012: 10.5 yards
  • YTD Used for Charity: 20.25 yards (50% of total used)

See more stash reports at Patchwork Times!