Monthly Archives: November 2014

Sunday Stash - Uh, I Can Explain

Grand Illusion step 1
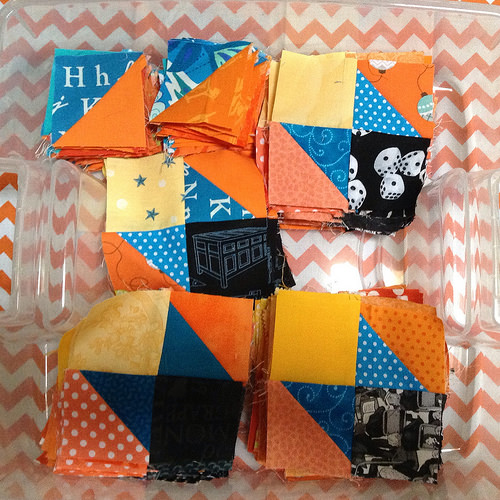
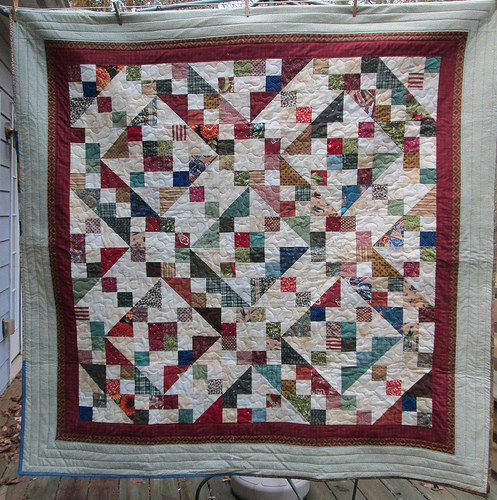
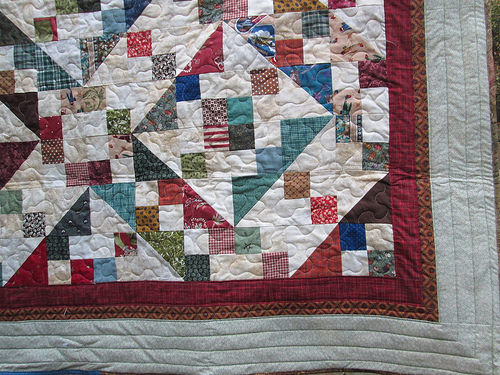
So, a big old Black Friday Sew In and most of my time sewing was spent making 280 HSTs and then 100 units for the Grand Illusion Mystery Quilt for Bonnie Hunter. Of course that doesn’t count towards stash usage the way I track since it’s not in a finished quilt!

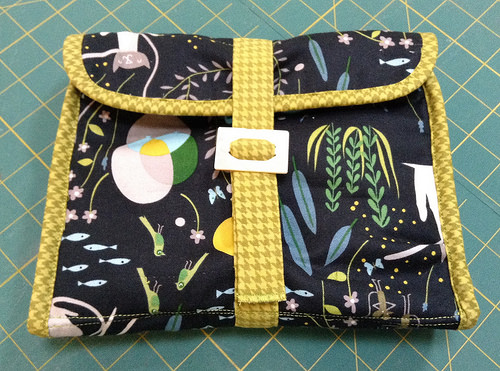
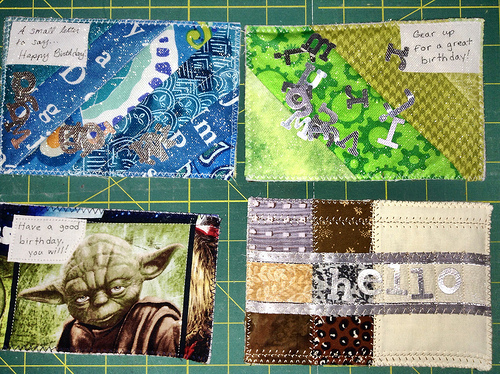
I also made 9 more postcards since I had batting scraps leftover from the bowl cozies, so that helped ooch my usage up. And I have my earlier week’s usage, too, from the bunting and the electronics organizer.

Festive Tablerunner
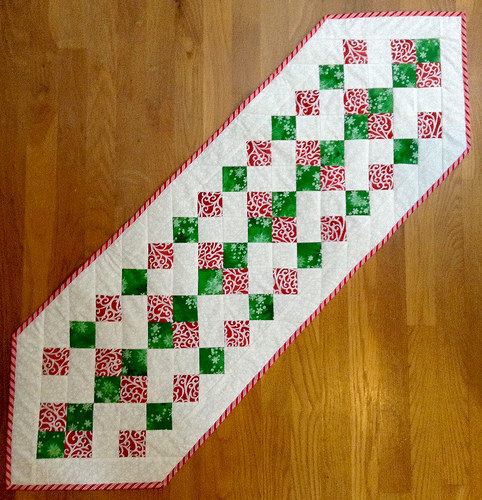
I also made a tablerunner using a pattern I found on Craftsy. It uses 2 jelly roll strips of red and 2 of green, and several more of white for the background.  It goes together quickly, so if you need a quick gift for the holidays, I’d recommend the pattern.  Mine is going into a gift swap at work.

Of course, all that usage was relatively negated by some serious yardage procured at the Black Friday sale at my LQS. A layer cake, a jelly roll, some FQs… the list goes on. Really, I’m doing it to shop local and support the economy! Anyway, I’m not so close to net 200 yards used as a result.

  • Used this Week: 4.25 yards
    • 0.5 yd for electronics organizer
    • 0.25 yd for more postcards
    • 2 yd for tablerunner
    • 0.5 yd for a gift for someone
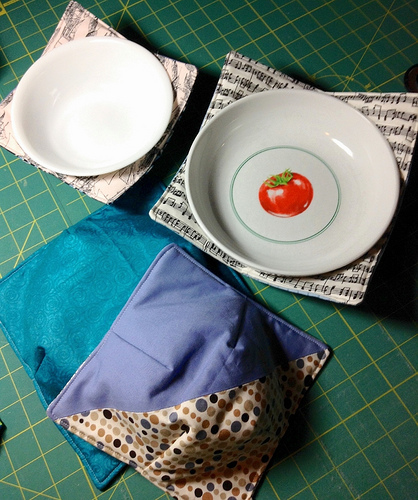
    • 0.5 yd for bowl cozies
    • 0.5 yd for bunting
  • Used year to Date: 321 yards
  • Added this Week: 10 yards
    • 10 yards various fabric for stash
  • Net Used for 2014: 193.25 yards
  • YTD Used for Charity: 116.25 yards (36% of total used)

See more Stash Reports at Patchwork Times!

HtbaS - Episode 206

It’s the Daisycast! Daisy of Very Lazy Daisy joins me to chat about sewing, Thanksgiving, pie, and Walking Dead spoilers. Also, there’s a bit of vomit reference up front so if you don’t want to hear it skip forward to the 6 minute mark or so (Fred had an accident overnight- bleh).

Skype got a little temperamental so there’s a couple drops/rejoins in there where we re-start the conversation. I did my best to even out the levels so hopefully it’s not too jarring.

Enjoy this extra-long #BFSI cast!

Play

WIP Wednesday - Very Merry

Hallelujah and pass the Tylenol! It’s Thanksgiving break.  I took today as an extra day off, primarily under the guise of “making cheesecake”, which is about 15 minutes of prep and 3 hours of blissful-hands-off baking.  Secretly I just wanted to tell everyone at work to SHOVE IT, which would have been more effective if everyone hadn’t taken the whole week off while I worked Monday & Tuesday like a schlub. Also, my boss is in Canada so he has to attend to any priority items that pop up this week, which is pretty much a joke since true Marketing Emergencies are pretty rare unless an exec has a bug in their britches.

Anywho, today I ran around to a bunch of errands with my daughter, then settled in for making Oreo cheesecake, hermit bars, banana bread, apple bread, peanut brittle, haystack cookies, and dinner at some point.  In the past few days, I’ve not only finished my two organizers, but also these goodies:

UntitledSoup bowl cozies! To prevent burning one’s fingers while handling hot soup bowls out of the microwave. I made two each of two sizes, which we lovingly refer to as “bachelor size” and “regular size” at our house.

Alas, a poor quality photo due to late night picture taking!

I made sure to use 100% cotton batting and thread so there was zero chance of polyester anything melting in the microwave.

The tutorial was pretty easy to follow, although I did trim my darts to reduce bulk. I just used some 10″ squares from my scrap stash and wasn’t too picky about matching, so all four look different. And don’t really match my kitchen. The inside of the drawer I stuck them in doesn’t seem to care, though.

12 Days of Christmas bunting
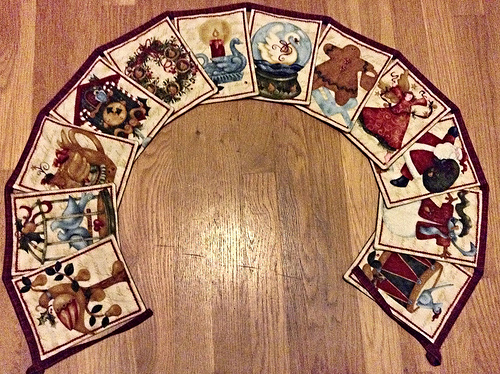
Also finished: Christmas Bunting!

This started as a Nancy Halverson 12 Days of Christmas flannel panel that I chopped into individual pieces.  I FMQed around the pictures with monofilament thread while they were backed with batting, and then backed with them various burgundy fabric. Then I busted out the bias tape maker and attached them all (in order from Days 1 - 12 because of OCD reasons), and as soon as Thanksgiving is over I hanging it over my fireplace.

UntitledIn other exciting news: The Grand Illusion Mystery starts on Friday! And don’t forgot to join us on twitter and elsewhere for the Black Friday Sew In!

Hanging Electronics Organizer

I’ve been noodling on a better way to organize the cords and electronic detritus associated with various iPods, phones, laptops, etc. when I travel, and saw this tutorial on Pinterest a month or so ago.

I like the idea: pouch for large bits plus elastic bands to tuck cords into. I wasn’t too fond of how the pouch actually attached to the rest, though, since it’s just stuck on with snaps.

Hanging Electronics OrganizerAfter I took the Sew Sturdy Travel Organizers class on Craftsy, I knew I had the answer to the zipper pouch issue, so here’s what I ended up with.

I jazzed up the elastic bands by covering them with fabric. My zipper pouch is attached to the organizer itself the same way as my hanging cosmetic organizer.

It did take a bit of experimenting with the size, and I maybe should have the pouch a bit smaller. Alas, it works regardless!

I used a slider I had in the button box for the closure, likely an inheritance from Grama Eddie’s collection, and added a hair elastic to the top so I could hang it up on my desk. This means I can hold all the bits and cords that Nina likes to shove off the desk when she’s feeling frisky (read: ALL THE TIME).Hanging Electronics Organizer

Unfurled, it measures 9 x 18″, and folded up it’s 9 x 9″ or so.

I used some my precious Catnap fabric to make since I’m trying to be better about using fabric I like rather than any old piece. Imagine me stroking the fat quarters and muttering “My preciousssss….” before cutting into them; it’s a pretty accurate visual.

Hanging Electronics Organizer

Finished Hanging Cosmetic Organizer

This weekend I finished the “Sew Sturdy Travel Organizers” class on Craftsy from Annie Unrein.  Knowing I have a couple trips coming up, I was particularly interested in the hanging cosmetics organizer.

I chose a fun Kaffe Fasset fabric for the exterior with a lime houndstooth for the interior and a purple for the accents.

Hanging Cosmetic OrganizerI purchased the hardware kit from byAnnie.com since I didn’t know that I could find all the hardware in the right sizes, and didn’t want to have to resort to purchasing large amounts of mesh just for the one project.

Hanging Cosmetic OrganizerI like how the straps are made - as fabric tubes that then get nylon webbing fed through it to make it very sturdy.  Having that firmness in the strap is what keeps the D-rings and other hardware from twisting within the loops.

I don’t have a teflon foot for my machine when sewing the vinyl, so I just used the tissue paper backing between the vinyl and the presser foot and that worked fine.

The bottom zipper pouch goes together easier than I expected, although still requires some pinning and slow sewing.  I was inspired by how it went together, though, so look for another finished project soon on that idea!

Fair warning, between the class cost ($39.99 regular, and I got it on sale at $19.99), the package of Soft & Stable (which I bought bigger than needed for this project since I use it for other projects), and the hardware kit (~$38 on the byAnnie.com website), and the fabric, it’s a pretty hefty cost for the one project.  If I make the other project in the class, that does lower the cost-per-unit, and you might consider hunting around for the various elements if you’re concerned about cost. Also, the “kit” on Craftsy is only for the fabric, not the hardware.

Having said that, I already used the pocket-making skill on another project so I’m happy with the value for the cost. Also, Jett won’t stop sleeping on this when it’s folded up so it’s a pretty nice cat bed, too. Sigh.

Happenings on #BFSI 2014

I work with a woman in Belgium who kindly said last week, “The entire United States needs to go away for a few days. I’m so glad you all have a holiday next week.” Truer words were never spoken.

There’s a little thing around here we like to participate in the day after US Thanksgiving called the Black Friday Sew-In. There’s a lot of ways to participate in it this year, so keep checking back for updates!

  • Chat with other #twilters (Tweeting Quilters) using the hashtag #BFSI.  That means just add “#BFSI” to any tweet or Instagram you send/post that day on quilting so people can follow along with all the fun.  Specifically for twitter, you can use tweetchat to track the hashtag.
  • Hang out with us on a Google chat! Daisy over at Very Lazy Daisy is coordinating a Google Hangout. Look for the announcement on twitter for the link to join the Hangout, or just watch on YouTube at 3pm US Eastern/2pm US Central
  • Participate in a giveaway! Some quilting bloggers are hosting giveaways, and I’ve provided a linky below for those that want to share their giveaway - you can link a blog post, Flickr photo link, Instagram link, or whatever you’d like that describes your giveaway.  Just plug the URL into the widget below.

Tudor Bag - Finished!

The Tudor Tote
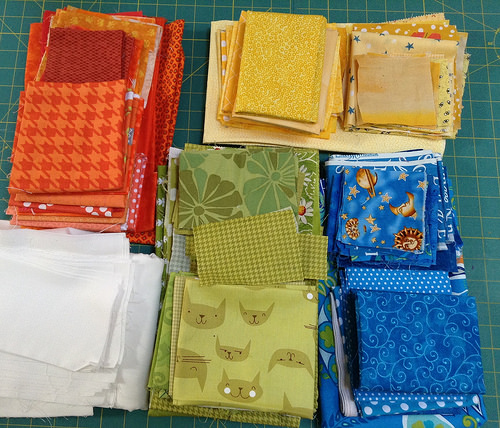
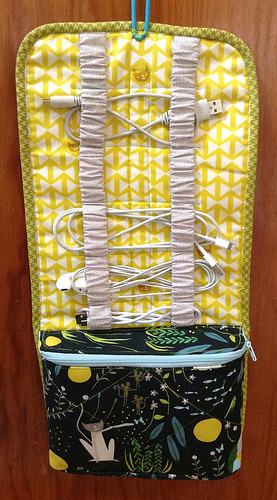
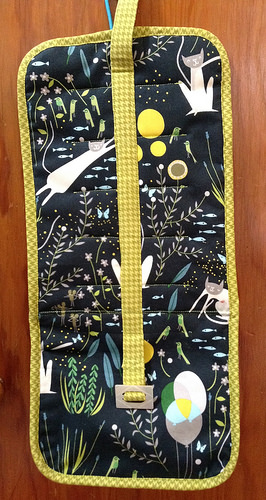
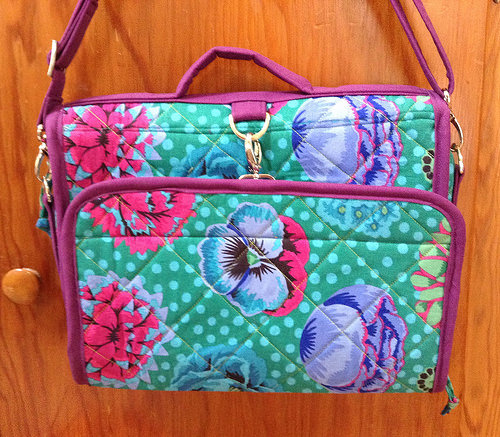
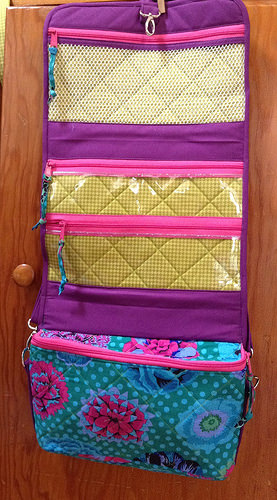
I got to test another pattern from Sara at Sew Sweetness recently, and I’m quite pleased with the project!  The pattern is called the Tudor Bag, and it’s a “beginner friendly” bag with lots of add-on options. Me, being me, added pretty much all of them on.

My options used were exterior zipper pocket, top zipper closure, and shorter handles.  I didn’t do the long shoulder strap, mostly because I lacked the hardware when I was making it.

I picked an large scale Amy Butler fabric for the exterior with a fun houndstooth for the accents.  The interior is another Amy Butler print.

The interior has additional pockets that are sewn into the seams and divided so your stuff stays sort of organized. As with most of Sara’s bags, she recommends Soft & Stable, which gives it some nice body and shape.  If you’ve been looking for a basic tote pattern with some not-so-scary options, give it a try!

The Tudor Tote

Sunday Stash - A Squeaker!

I juuuuusssssst finished a second project this weekend. Like, just now, clipped the final strap on and turned off the machine 2 minutes ago.  I haven’t even taken the time to stretch out my back from the intense sewing so I’m writing this like I live in a bell tower in a French Gothic novel.

Anywho, a billion and one finishes later, I’ve made another bunch of postcards this week and finished the Sew Sturdy Travel Organizer Hanging Cosmetic Bag from Annie Unrein on Craftsy. As with most bag classes, the tricky part is watching out for the bulk in seams, and it’s not too bad.  I’ll have more coherent thoughts on the class when I post pictures of my finished bag tomorrow or so, but suffice to say, I didn’t die while making it.

Ah, yes, writing reviews while bleary-eyed and hunchbacked. “This project didn’t kill me so I guess it’s pretty good. Two soulless-eyes-staring-into-the-void up!”

I did manage to slice my fingertip open yesterday while making more postcards, thanks to Nina walking in front of me while I was at the machine. It should heal quickly but, still, ouch.  Here’s a sample of what I finished this weekend; I think I’m done with postcards since I’m out of batting scraps (more on that later) and the will to carry on with these things.

Postcards

The metallic letters I’ve had for TEN YEARS; I originally got them to embellish a single scrap book page for my in-laws when my now-10 year old was a baby, and I’m happy to finally find another use for them.  They are held in place either by ribbon (which I took off a present my cousin mailed me this week - technically she didn’t tell me to wait until Christmas to open it!), or tulle.  The Yoda one is awesome just because.

I also pieced together a bunch of Frankenbatting since the batting drawer was getting a bit crazy.  I also want to make some soup bowl caddy things since we’ve been eating a lot more stew since the weather got colder, so that’s next up, I think.

  • Used this Week: 3.25 yards
    • 0.5 yd for postcards
    • 2.75 yd for Hanging Cosmetic Organizer
  • Used year to Date: 321 yards
  • Added this Week: 0 yards
    • Woohoo!
  • Net Used for 2014: 199 yards (soooooo close!)
  • YTD Used for Charity: 116 yards (36% of total used)

See more Stash Reports at Patchwork Times!

Aunt S’s Quilt - Finished!

I’m quite pleased with how this turned out, and that I had all the 5″ squares already cut in my stash.  I’m still working through my stash to use up these more muted colors since I am personally drawn to the brighter tones, and it’s nice to have an outlet to gift this type of fabric!

Aunt S's Quilt

Aunt S's Quilt
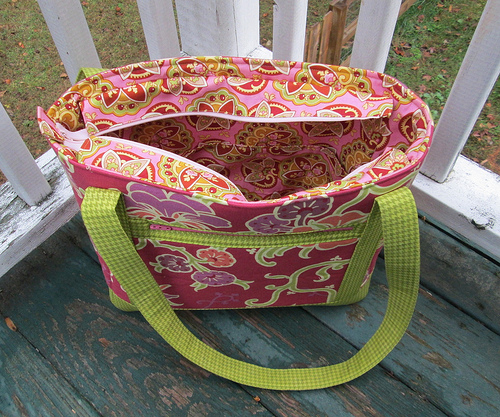
This will be given to a relative at Thanksgiving, so I need to dehair it (again) and wrap it up (so I don’t have to dehair it a third time).

The quilting in the center is an overall meander, with straight line quilting on the 3 borders.

I had a little fun with the back since I knew I wanted to use this leaf print I’ve had in my stash forever, but the piece wasn’t quite long or wide enough so I quartered it and pieced in 10″ squares in the same muted tones, also from my scrap stash.

Aunt S's Quilt - Back

HtbaS - Episode 205

It’s the Distractedcast! Jett pops in for some heavy breathing into the mic, and I give an impromptu book review on something I saw on a blog and then immediately went and bought, which is rare for me.

Check out Scraps, Inc from Tauton Press.  During the blog tour you can get the book 30% off the original price Enter discount code SCRAPS30 (click on discount code for link), the code is good through Dec. 1st.

Note: in the course of the episode I sound pretty dumb when asked about Featherweights because I forgot Featherweights = Singer 221. Ooops.  I am not sure, however, what the difference is between a 221 and a 222, but perhaps Tina does?

Play